
This post may contain affiliate links. Please read our disclosure policy for more information.
As a full-time blogger at FinSavvy Panda for several years, I get many questions on how to set up a blog theme. With thousands of emails about themes, I seriously lost count over the years since this is one of the most common things I get asked.
That led me to create The Treasure Map To Blogging Success in 30 Days, my best-selling blogging e-book for beginners like you, who just want to get your blog set up with a strong foundation, so you can quickly move onto the next stage of your blogging journey (without the guesswork or wasting time), which is learning how to get traffic and make money with your blog.
It’s impossible to get pageviews and make money with your blog if you don’t even have a theme setup correctly with the proper foundations in the first place. That’s why I want to teach you how to set up your blog using the Astra Theme, one of the most popular WordPress themes out there.
In fact, many professional bloggers will recommend the Astra theme because of its great performance and speed. Not to mention, the Astra theme is incredibly lightweight and mobile-friendly, which is great for Google search engine rankings.
PIN THIS: I’ll be updating this post, so don’t forget to save this pin to your Pinterest board – that way you can easily come back to this page for all the information you need.
Benefits of the Astra Theme
Benefits of the Astra Theme include the following:
- Lightweight
- Fast-loading
- Very beginner-friendly (it’s not uncommon to see that many experienced and pro bloggers continue to run with it)
- Super easy to customize
- Free (although you can upgrade to paid versions)
Honestly speaking, if I were to start a new blog over again, it’s the theme I would choose due to its simplicity.
I really wish I knew about the Astra theme when I first started my blog because it would have saved me a ton of time from navigating other random themes that seemed too technical and complicated. Not to mention, one of the first blog themes that I was using was slow speed too, which can negatively affect how people will find you on search engines like Google.
So, today, I will be using the free version Astra theme as an example in this guide to help you get your blog up and running as soon as possible.
The steps and concepts will be similar for most WordPress themes, but not exactly the same since all themes are made differently and with different settings/functions. Still, this should give you some guidance on what to look for when setting up any blog.
Again, I can’t stress this enough, but I want to keep harping that you should really give this theme a try (especially if you’re a total beginner who is not tech-savvy). It’s much easier using a theme like Astra because it’s barebone and will help you get your blog moving along nicely.
Okay, let’s get started!
How To Install and Setup Astra Blog Theme for Beginners
First of all, we’re going to help you install Astra onto WordPress before you set up and customize your blog.
DON’T HAVE A BLOG YET? If you haven’t started your blog yet, I recommend following my step-by-step Bluehost tutorial here on how you can get started.
I also have my post, Starting a Blog Checklist, to guide you through the steps you need to take to create your blog.
Step 1: Log into your WordPress admin.
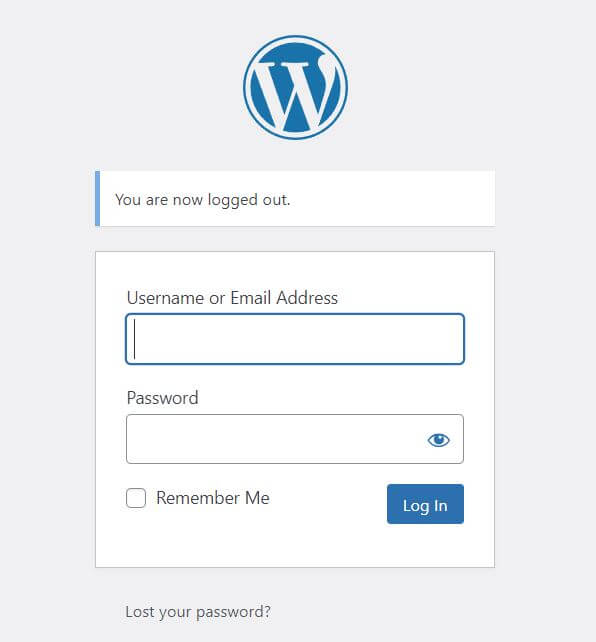
You can do this by going to www.yourdomainname.com/wp-admin.
For example, if your blog domain name is ilovepinkcats.com, then type www.ilovepinkcats.com/wp-admin into your web browser.
Next, enter your username (or e-mail address) associated with the account along with your password.
If you forgot your password, or don’t know it, just reset it and create a new one.
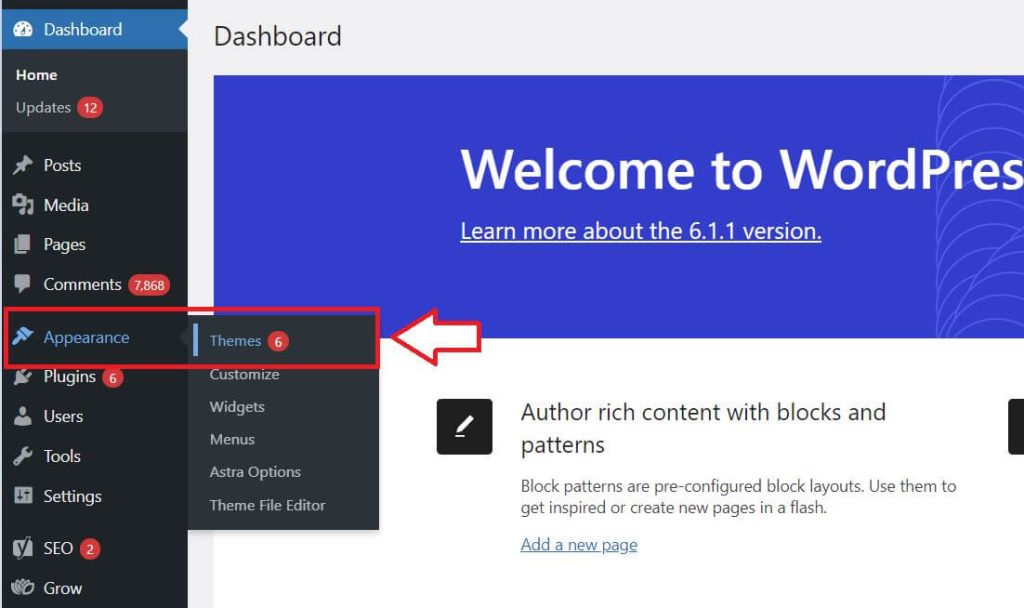
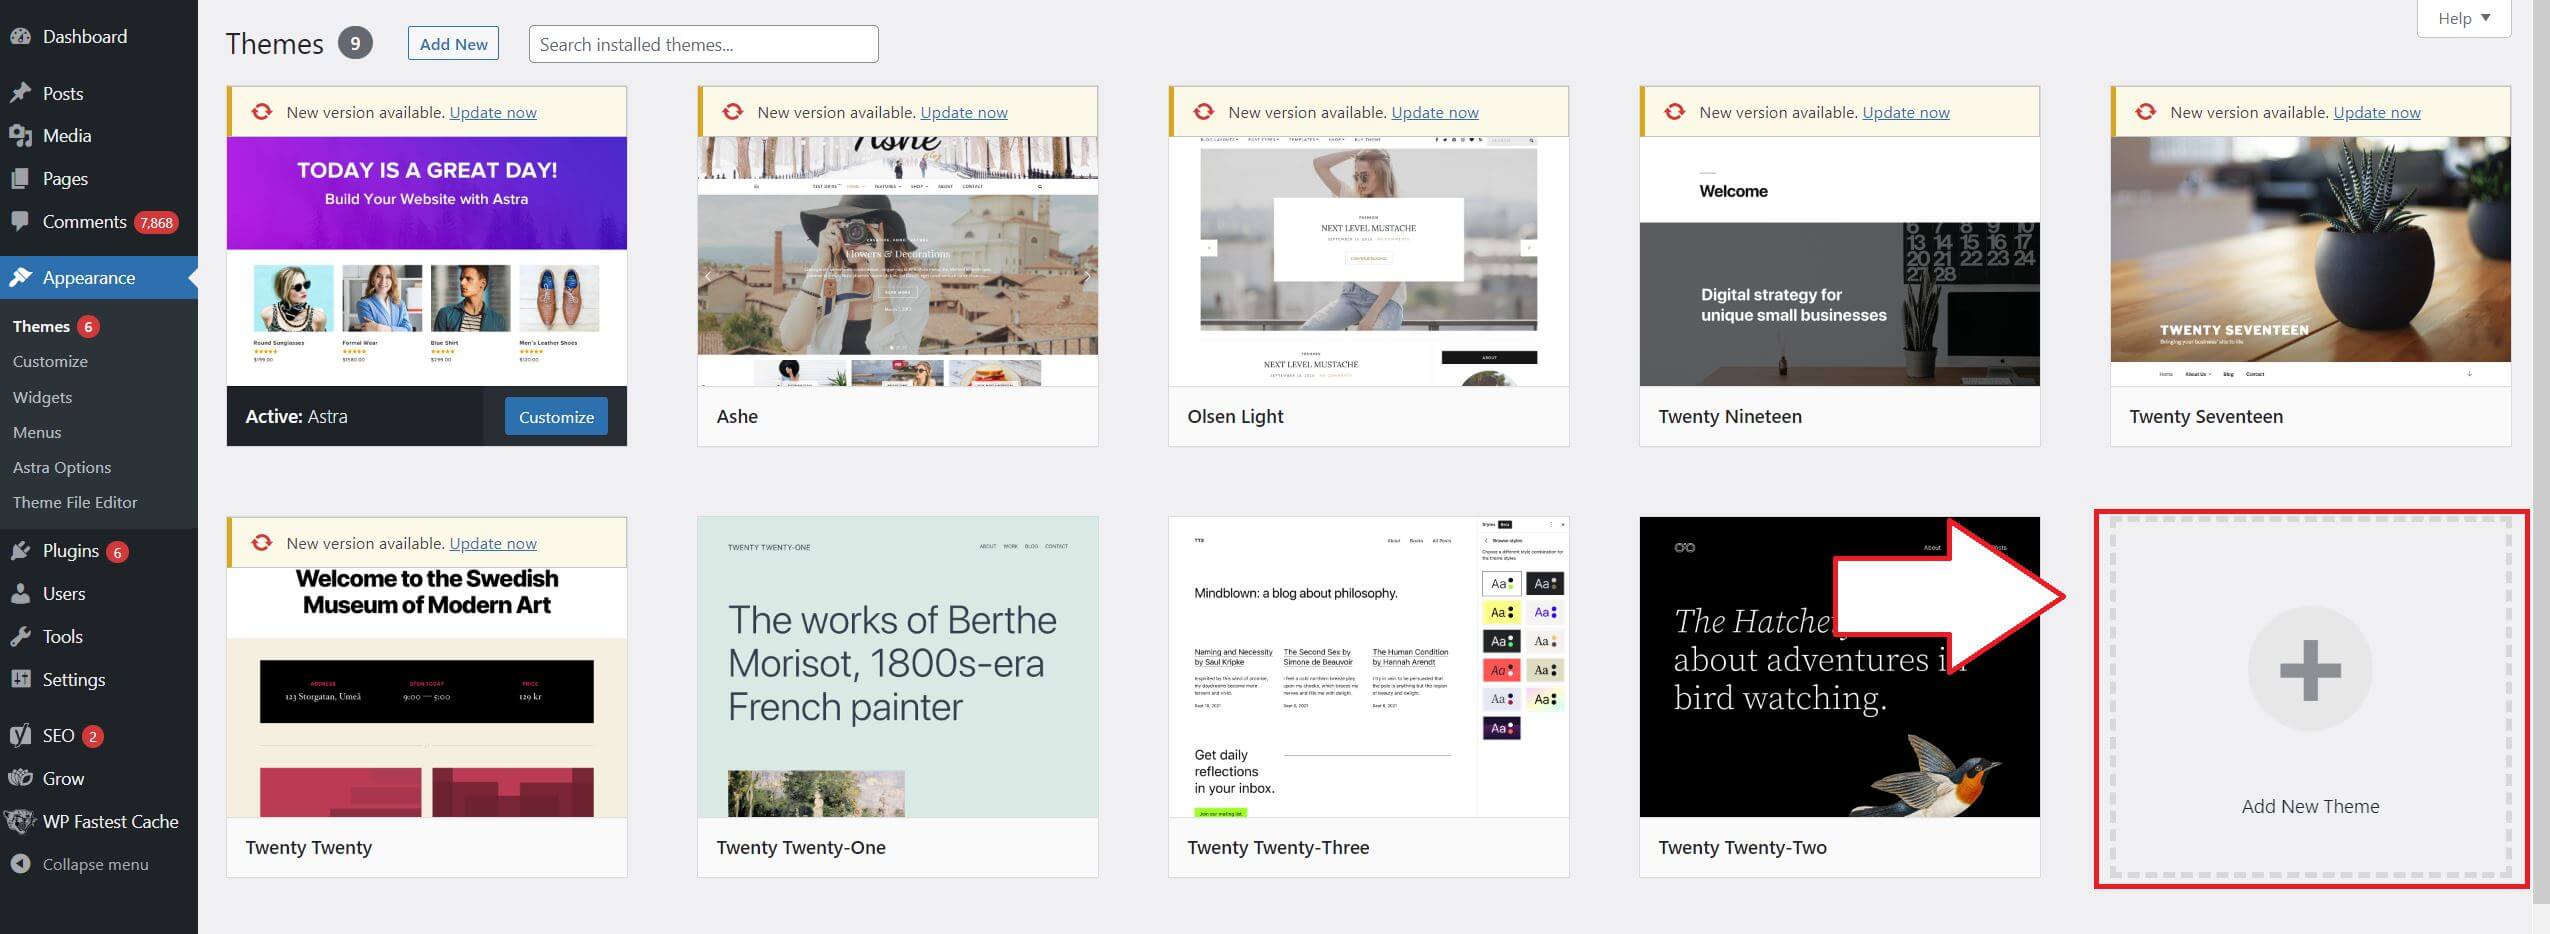
Step 2: Go to “Appearance” >> “Themes”
On the left side of your WP dashboard panel, go to “Appearance” >> “Themes”.
Step 3: Add a New Theme
You’ll see something like this where you can see a list of themes you’ve used.
If your account is totally brand new, you may only see the box, “Add New Theme”.
Click on that big box with a “+” sign – “Add New Theme”.
Step 4: Search for the Astra theme
In the search bar where it says “Search themes…”, type in “Astra” and hit enter.
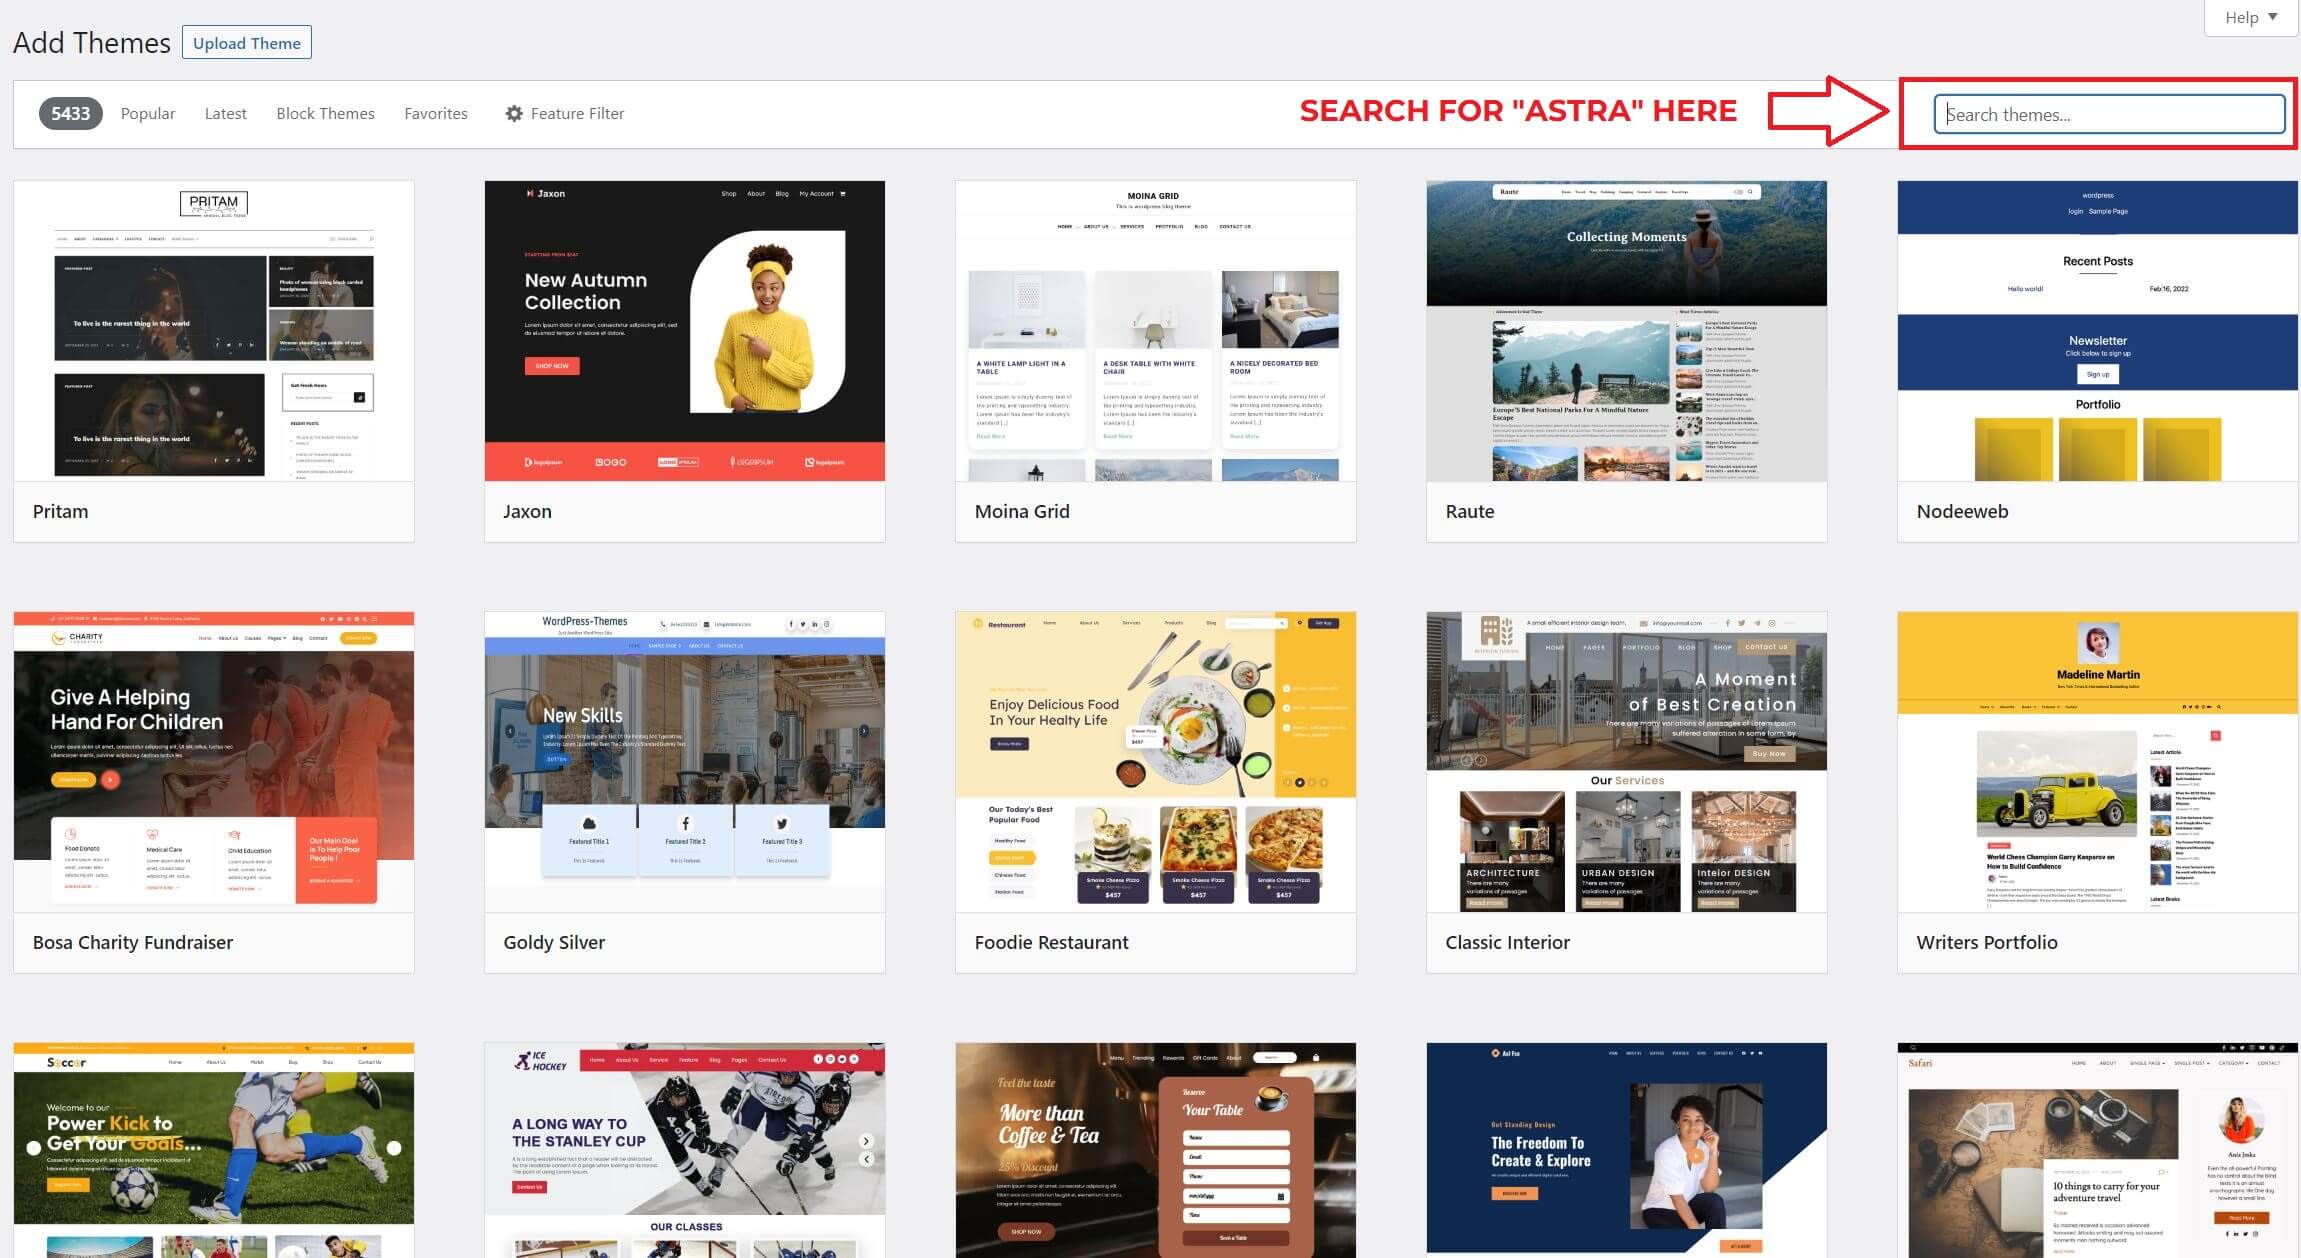
Next, you’ll see the Astra theme, which looks like this:
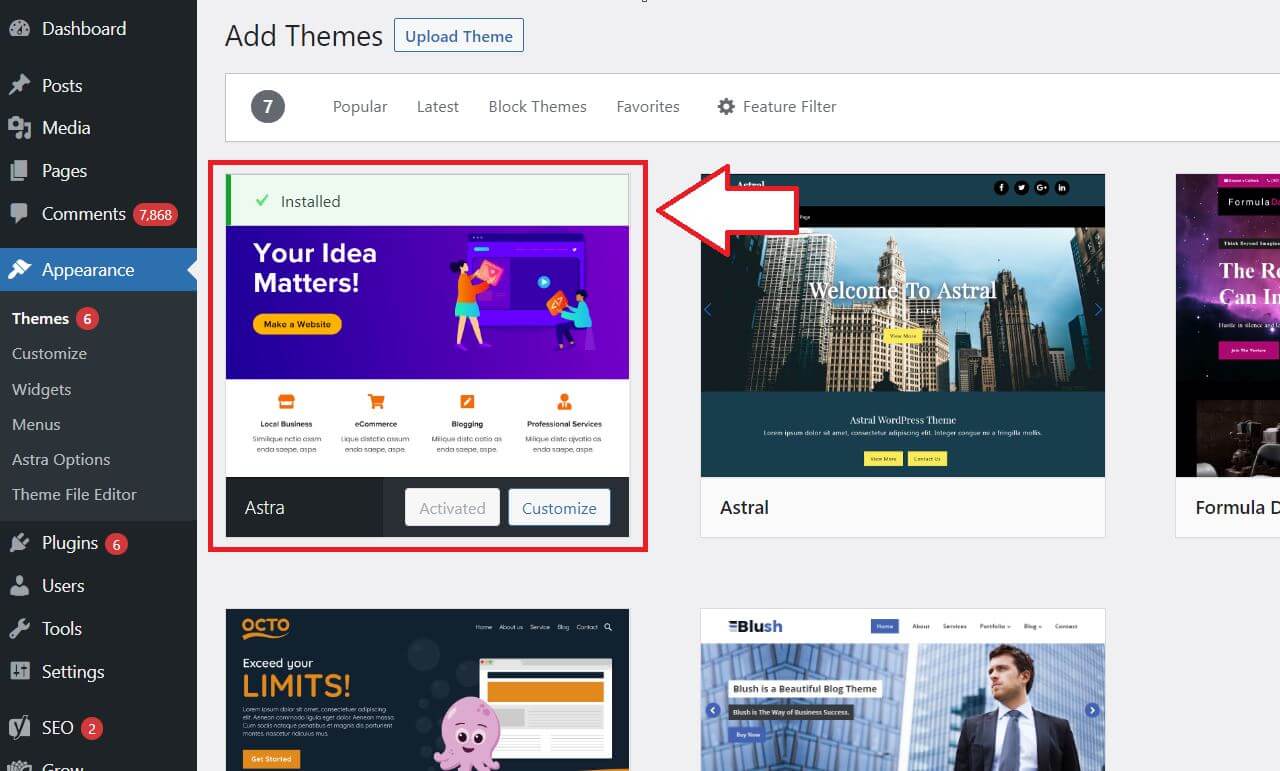
Hover over the theme and click on the “Install” button.
You can also click on “preview” to see how the theme looks on your desktop and mobile.
Step 5: Customize your theme
Once you’ve installed the Astra theme, click on the “customize” button so you can start customizing your theme.
There are so many ways to stylize and tweak your theme – all you have to do is navigate around and play with it.
In this remaining guide, I’ll give you the basic setup plan with the Astra theme so you can get this out of the way and start focusing on what’s important – writing your blog posts without stressing about how your theme looks!
But before that, I want to mention some really important tips. Whatever I’m about to say, please nail this in your head, and just trust me based on my own experience. In fact, most experienced bloggers will very likely say the same too.
Some Tips For Setting Up Your Blog Theme:
Your blog theme doesn’t have to look pretty or “fancy Dancy” for now.
Repeat after me.
“My blog does not have to look perfect.”
If you’ve just started your blog as a beginner, I highly recommend getting this very basic theme setup without dwelling so much on aesthetics or appearance.
I hope you can just trust me on this!
Why?
1. Writing blog posts for your readers and traffic is a priority (NOT how pretty your blog looks)
For one, focusing on keyword research and publishing your content is a top priority if you want to get blog traffic as soon as possible, which I cover extensively from every corner, angle, and even spec in The Golden Compass To Pinterest Traffic.
I often see SO many beginners dwell and spend all that unnecessary time on their themes that they lose sight of why they even started their blogs.
They become hung up about every little detail that they don’t end up writing and publishing a good amount of content until 3 or 6 months later.
It’s not uncommon for me to see people publish even 1 year later. The crazy part is even at that time (after 6 months to 1 year, sometimes even 2 years), they STILL dwell over their themes while also wondering why their blog isn’t taking off as soon as they hoped.
As you can see, they’ve got their priorities set backward.
2. No one remembers how your website looks
Secondly, no one is visiting your blog (especially when it’s new), so it doesn’t matter how it looks at the moment. Even if you do get traffic, no one remembers when they first interact with your blog.
Plus, your blog appearance and how you want to build your brand can easily be changed or tweaked once you start getting more and more traffic. I can guarantee that you’re pleasing no one when you spend all that time on your theme.
I’ve always had readers ask me how I was able to earn a full-time income with my blog within 12 months.
Looking back, I realized that NOT dwelling on how my blog’s appearance was one factor that helped me focus my time, energy, investment, and effort on areas that generated a WAY higher return – that includes learning Pinterest for traffic, Tailwind, how to write blog posts, and understanding how blogs really make money behind the scenes.
How pretty your blog looks is not a top priority at the beginning.
IMPORTANT NOTE: I am NOT saying that your theme should look ugly or be an eye sore. That is NOT acceptable, and you should put effort into your theme. It should look presentable and aesthetically pleasing, but it doesn’t have to be professional grade. You can always improve this on the go, or when you have time once you’ve prioritized publishing your content and learning how to get traffic to your blog.
If you really want it to look professional right off the bat, you can hire someone to do this for you, but I don’t recommend this until you have more experience with blogging and knowing what your readers want.
Astra Basic Setup Guide
Now that you’ve installed the Astra theme, here are the basic setups I recommend.
As a prerequisite, please have at least one blog post published before proceeding with this guide, so you can follow along.
Having at least one blog post, or even up to 3 articles ready on your website will make it easier for you to visualize your customization.
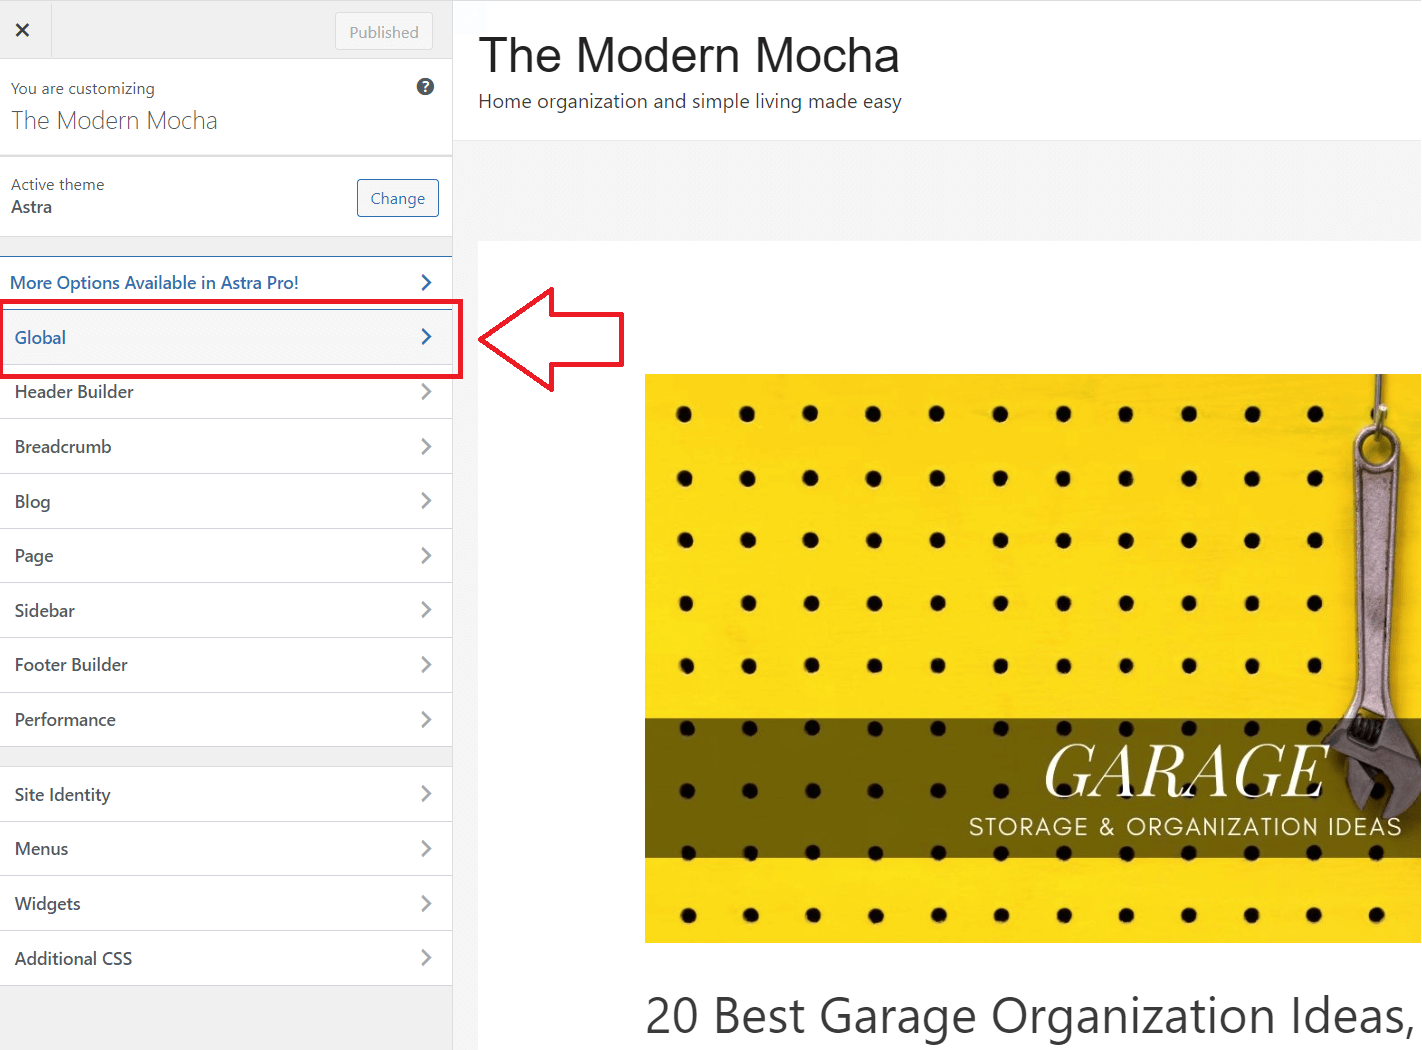
In the remaining tutorial, I am going to use one of my test websites to demonstrate this. This website is called The Modern Mocha, and I created this blog separately to help you set up your blog.
The Modern Mocha is not intended to get traffic or to monetize – it exists to show beginners like you how to set up your blogs with a fast and lightweight theme like Astra. By demonstrating The Modern Mocha as an example, it will help you move forward and reach your blogging goals much faster.
After all, who doesn’t want to make money with their blogs as fast as possible?
And yes, there are actually many blogs (a lot of them out there you aren’t aware of) that use the Astra theme (including the free version).
I know, I know…
It looks quite plain and barebone, but you’ll be surprised to hear that those blogs actually earn a full-time income. It’s how FinSavvy Panda started off too, but with a much slower and less responsive theme.
I admit I had a lousy theme with my first blog, but it still earned over six figures per year – that goes to show that looks aren’t everything when it comes to earning an income online; it’s more so your content and personality behind the blog. I applied the same concepts and steps to my anonymous lifestyle blog after realizing how many mistakes I made with my first blog.
So, as you can see, you are on a much better start compared to me when I was a beginner. 😊
Again, you can always tweak your theme and fancy it up once you’ve set up a basic foundation and become a little more experience with blogging.
Now, let’s get back to where we left off from step 5 above.
I won’t go through every single setting or function since that can take up to 500 pages of documentation, so I will highlight the important ones to get your blog ready for launch.
Global (“Typography”):
Once you’re in “customization”, from step 5 above, your screen should look something like this.
This category contains one important aspect of your theme appearance, which is the “typography” (AKA font, text, and size).
Typography is broken down into two categories – “base font” and “heading font”.
The general rule of thumb is you’ll want your font to be big enough for your readers to read from their devices.
Here’s what I did with The Modern Mocha website. The link to this post is here and you can follow these settings, and/or tweak them to your own preference.
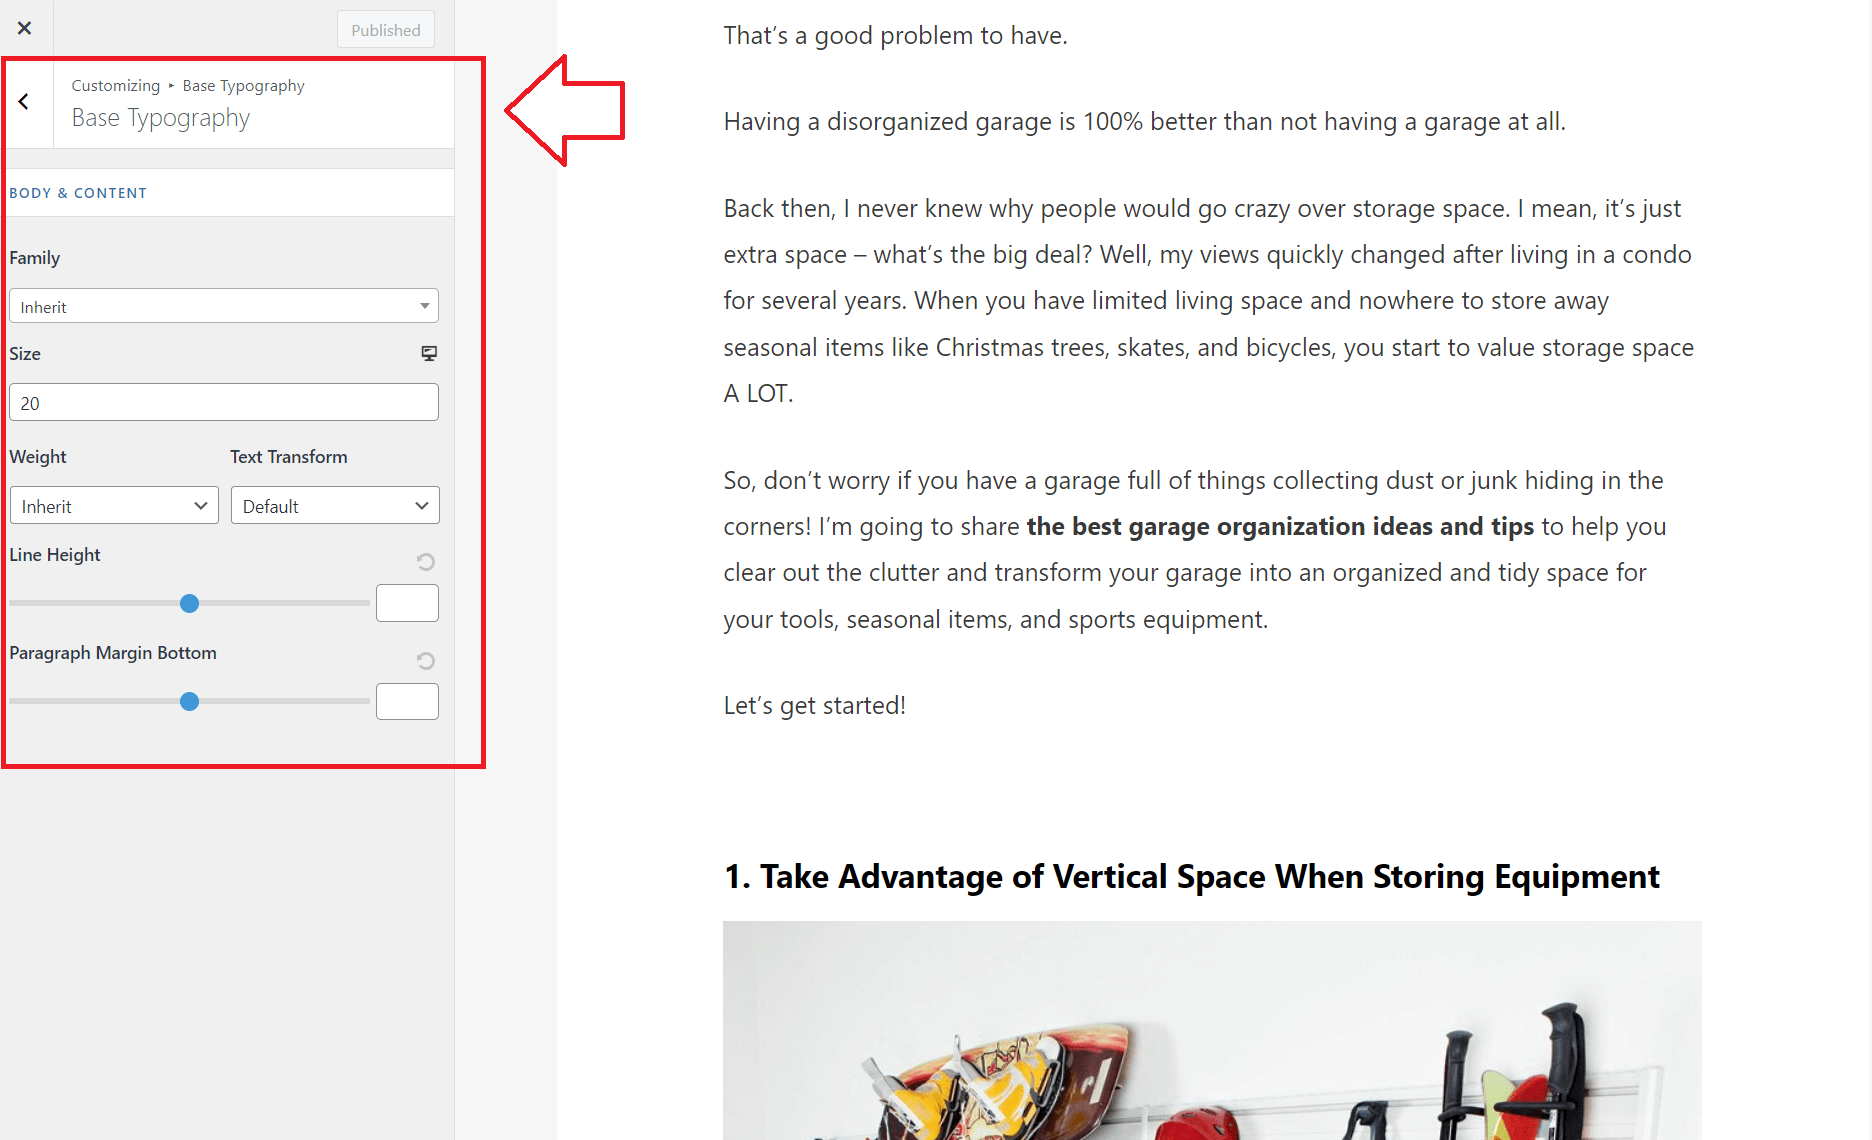
Base Font: You can choose your font and size in this setting. I recommend choosing anything between 18 to 20 PX, but it depends on what font face you pick.
- Family: Inherit
- Size: 20
- Weight: Inherit
- Text Transform: Default
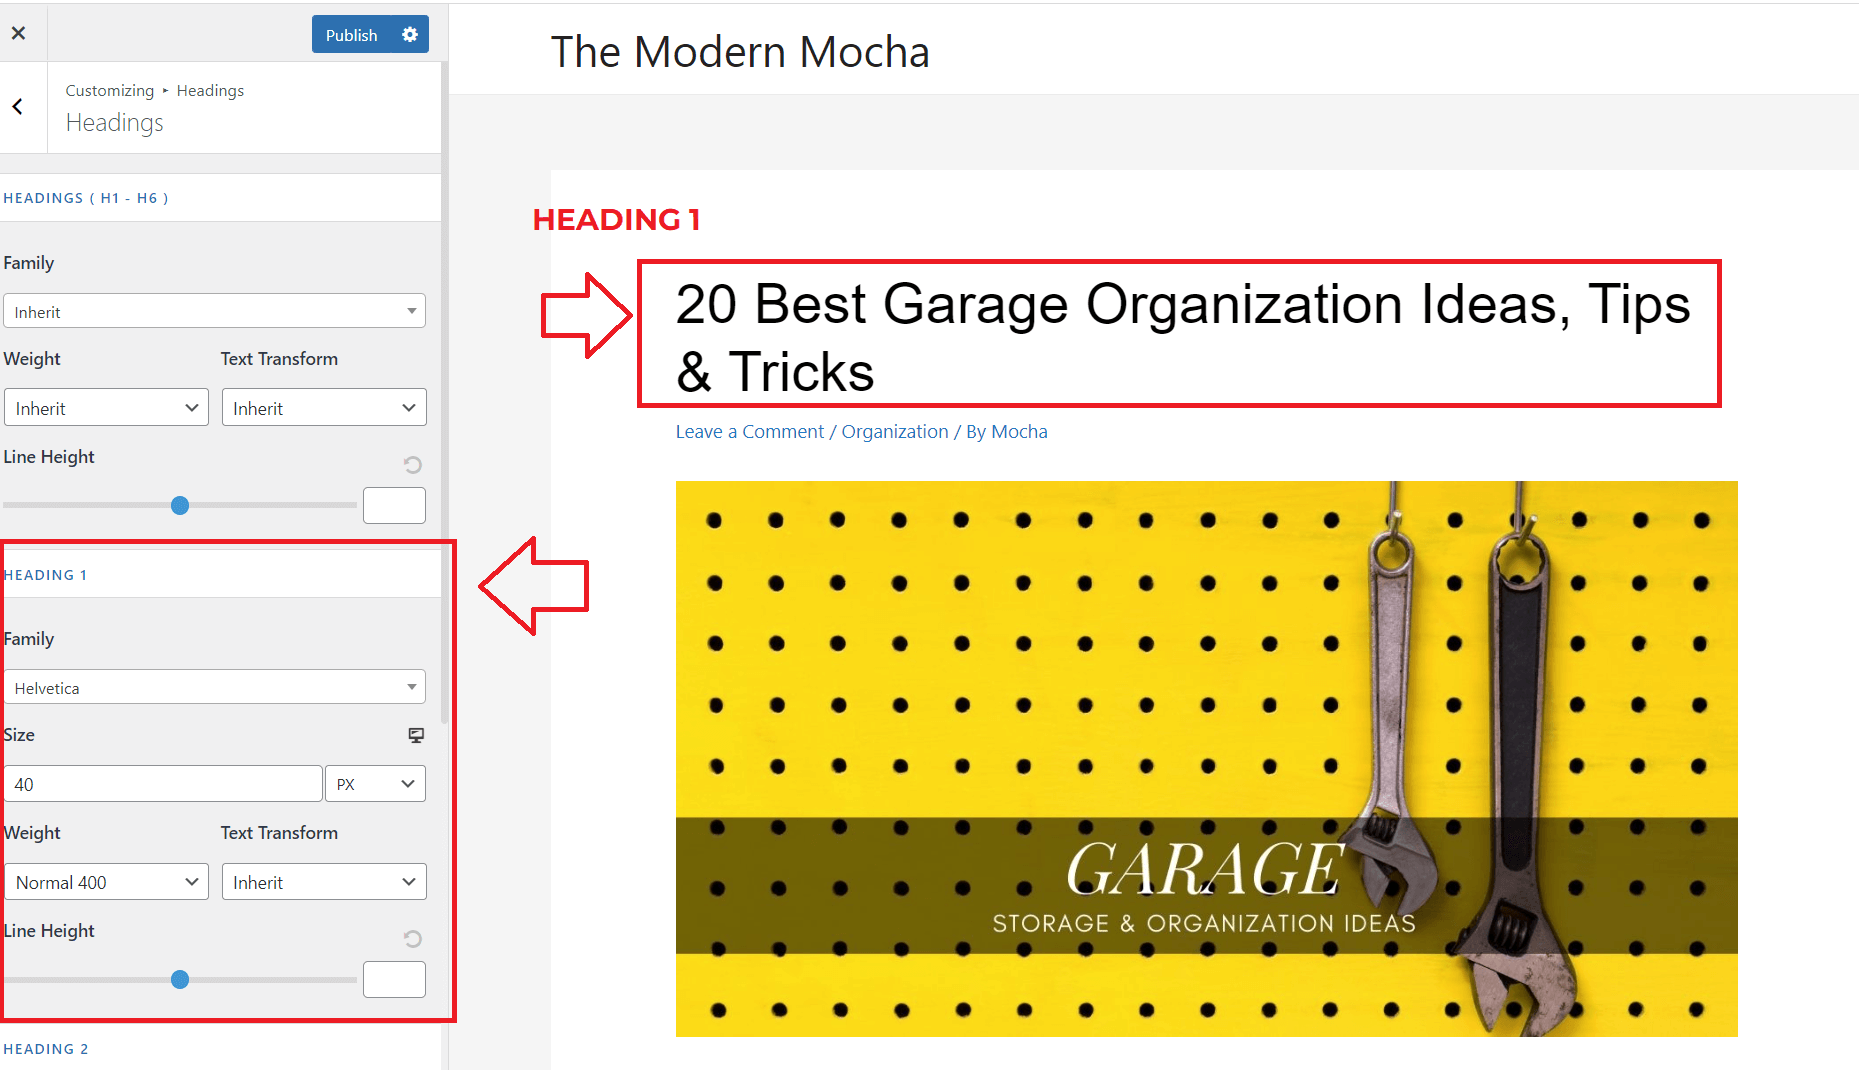
Heading Font: Heading 1 is generally the title of your blog post whereas heading 2 is the subtitle.
Here is what heading 1 looks like at size 40 PX:
And here is heading 2, at size 26 PX, which are my subtitles:
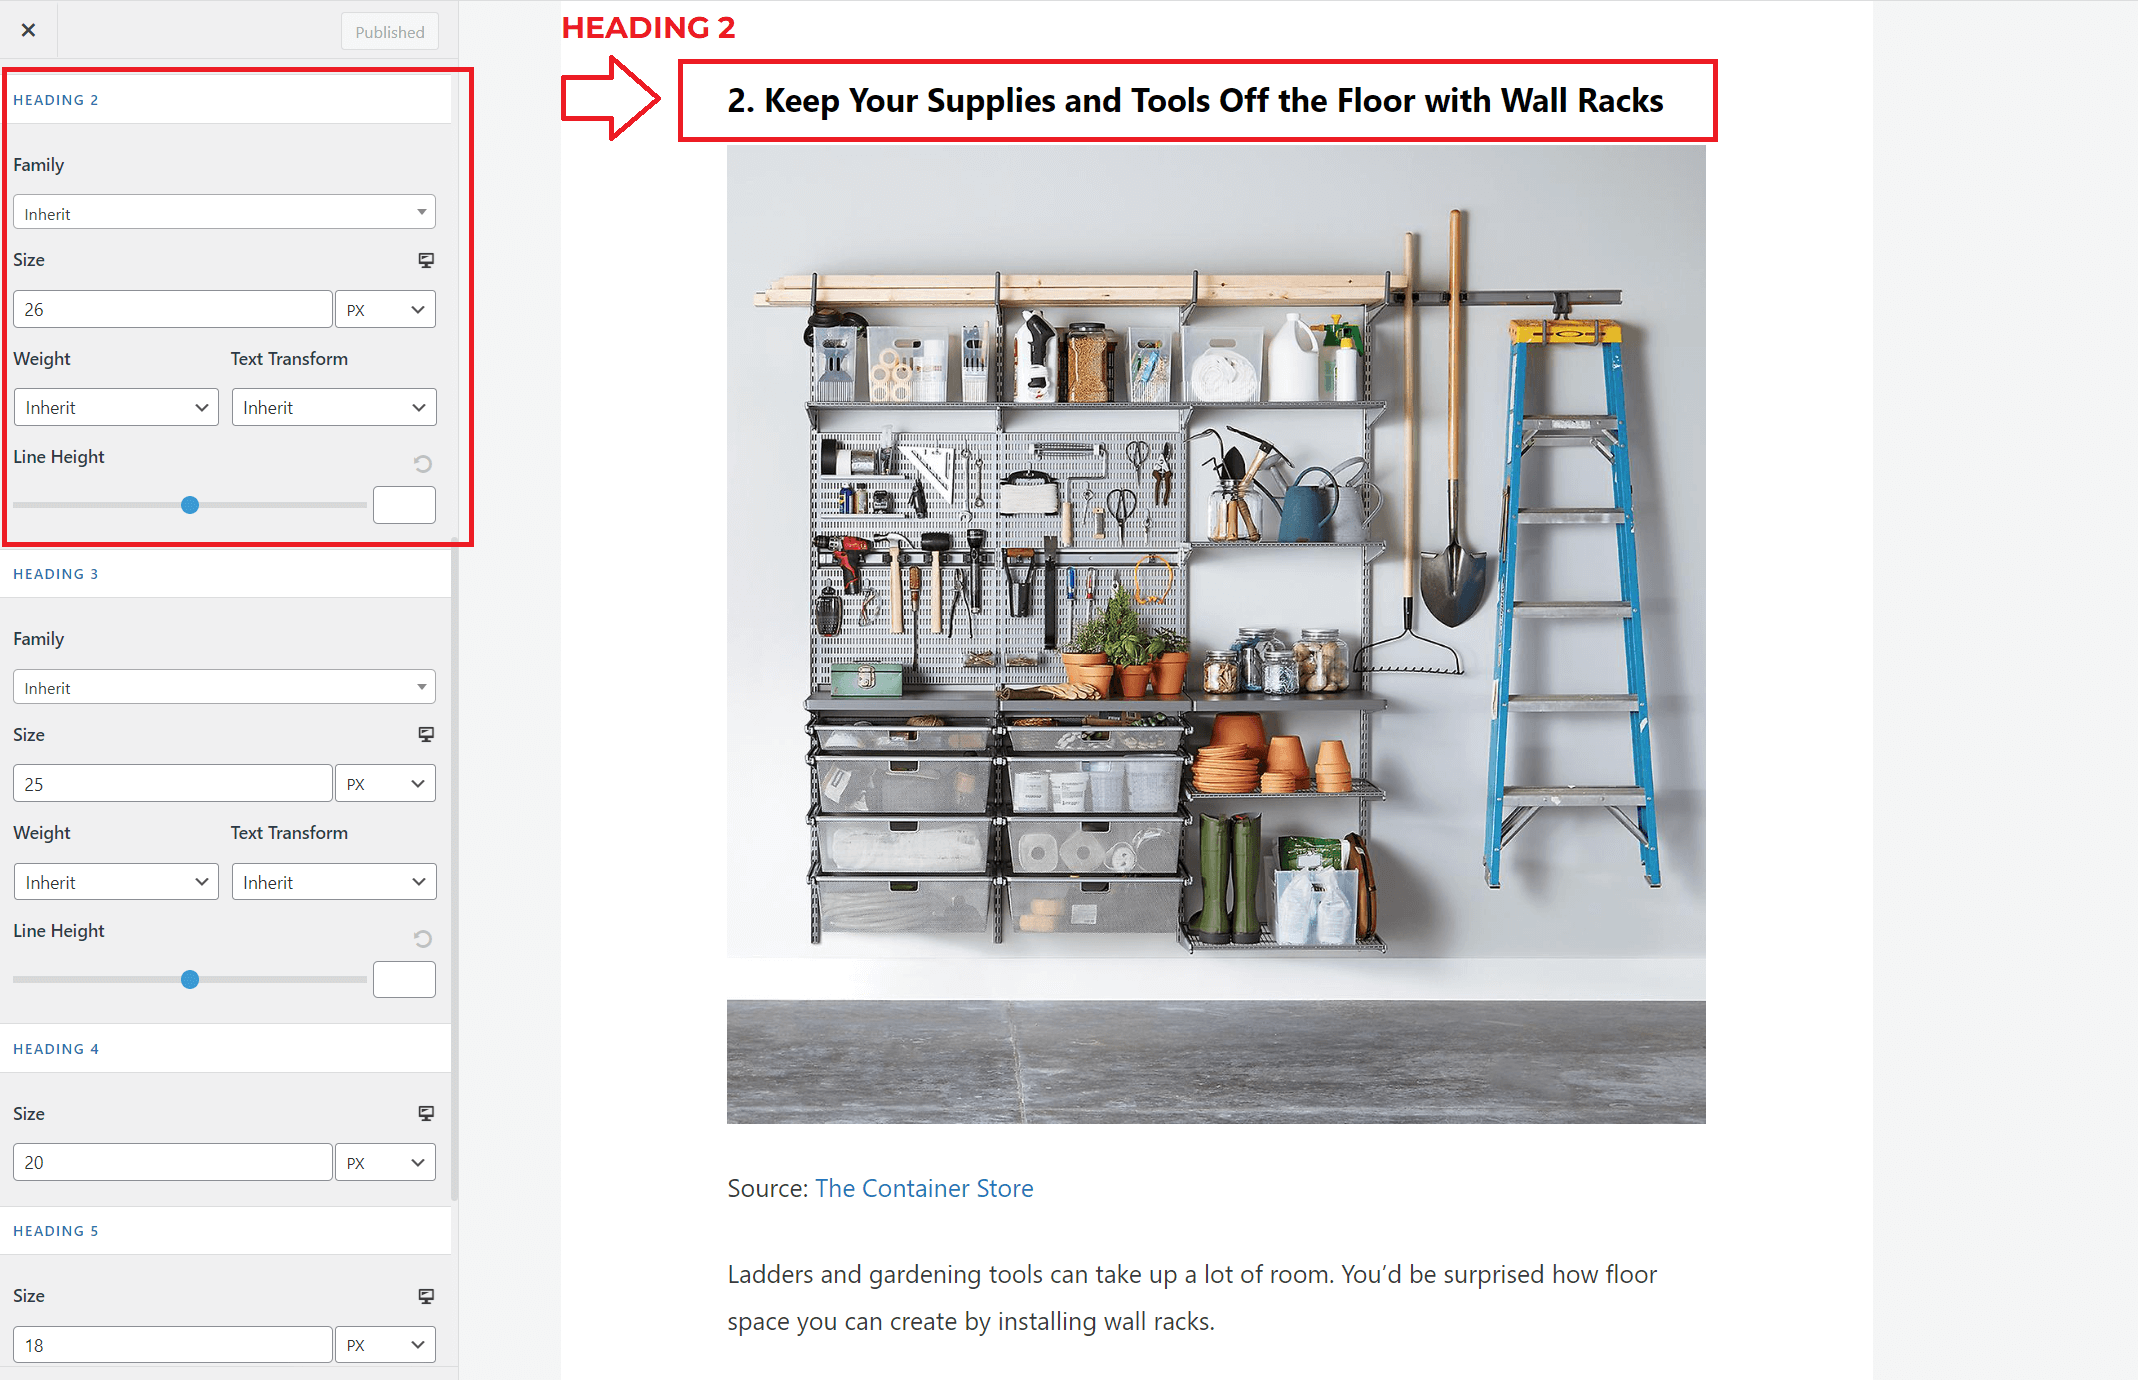
There are also headings 3 and 4, which I rarely use. I usually use up to heading 3, but anything beyond that is unnecessary. You can choose the sizes of each heading as you wish.
Global (“Container”) AKA Theme Layout:
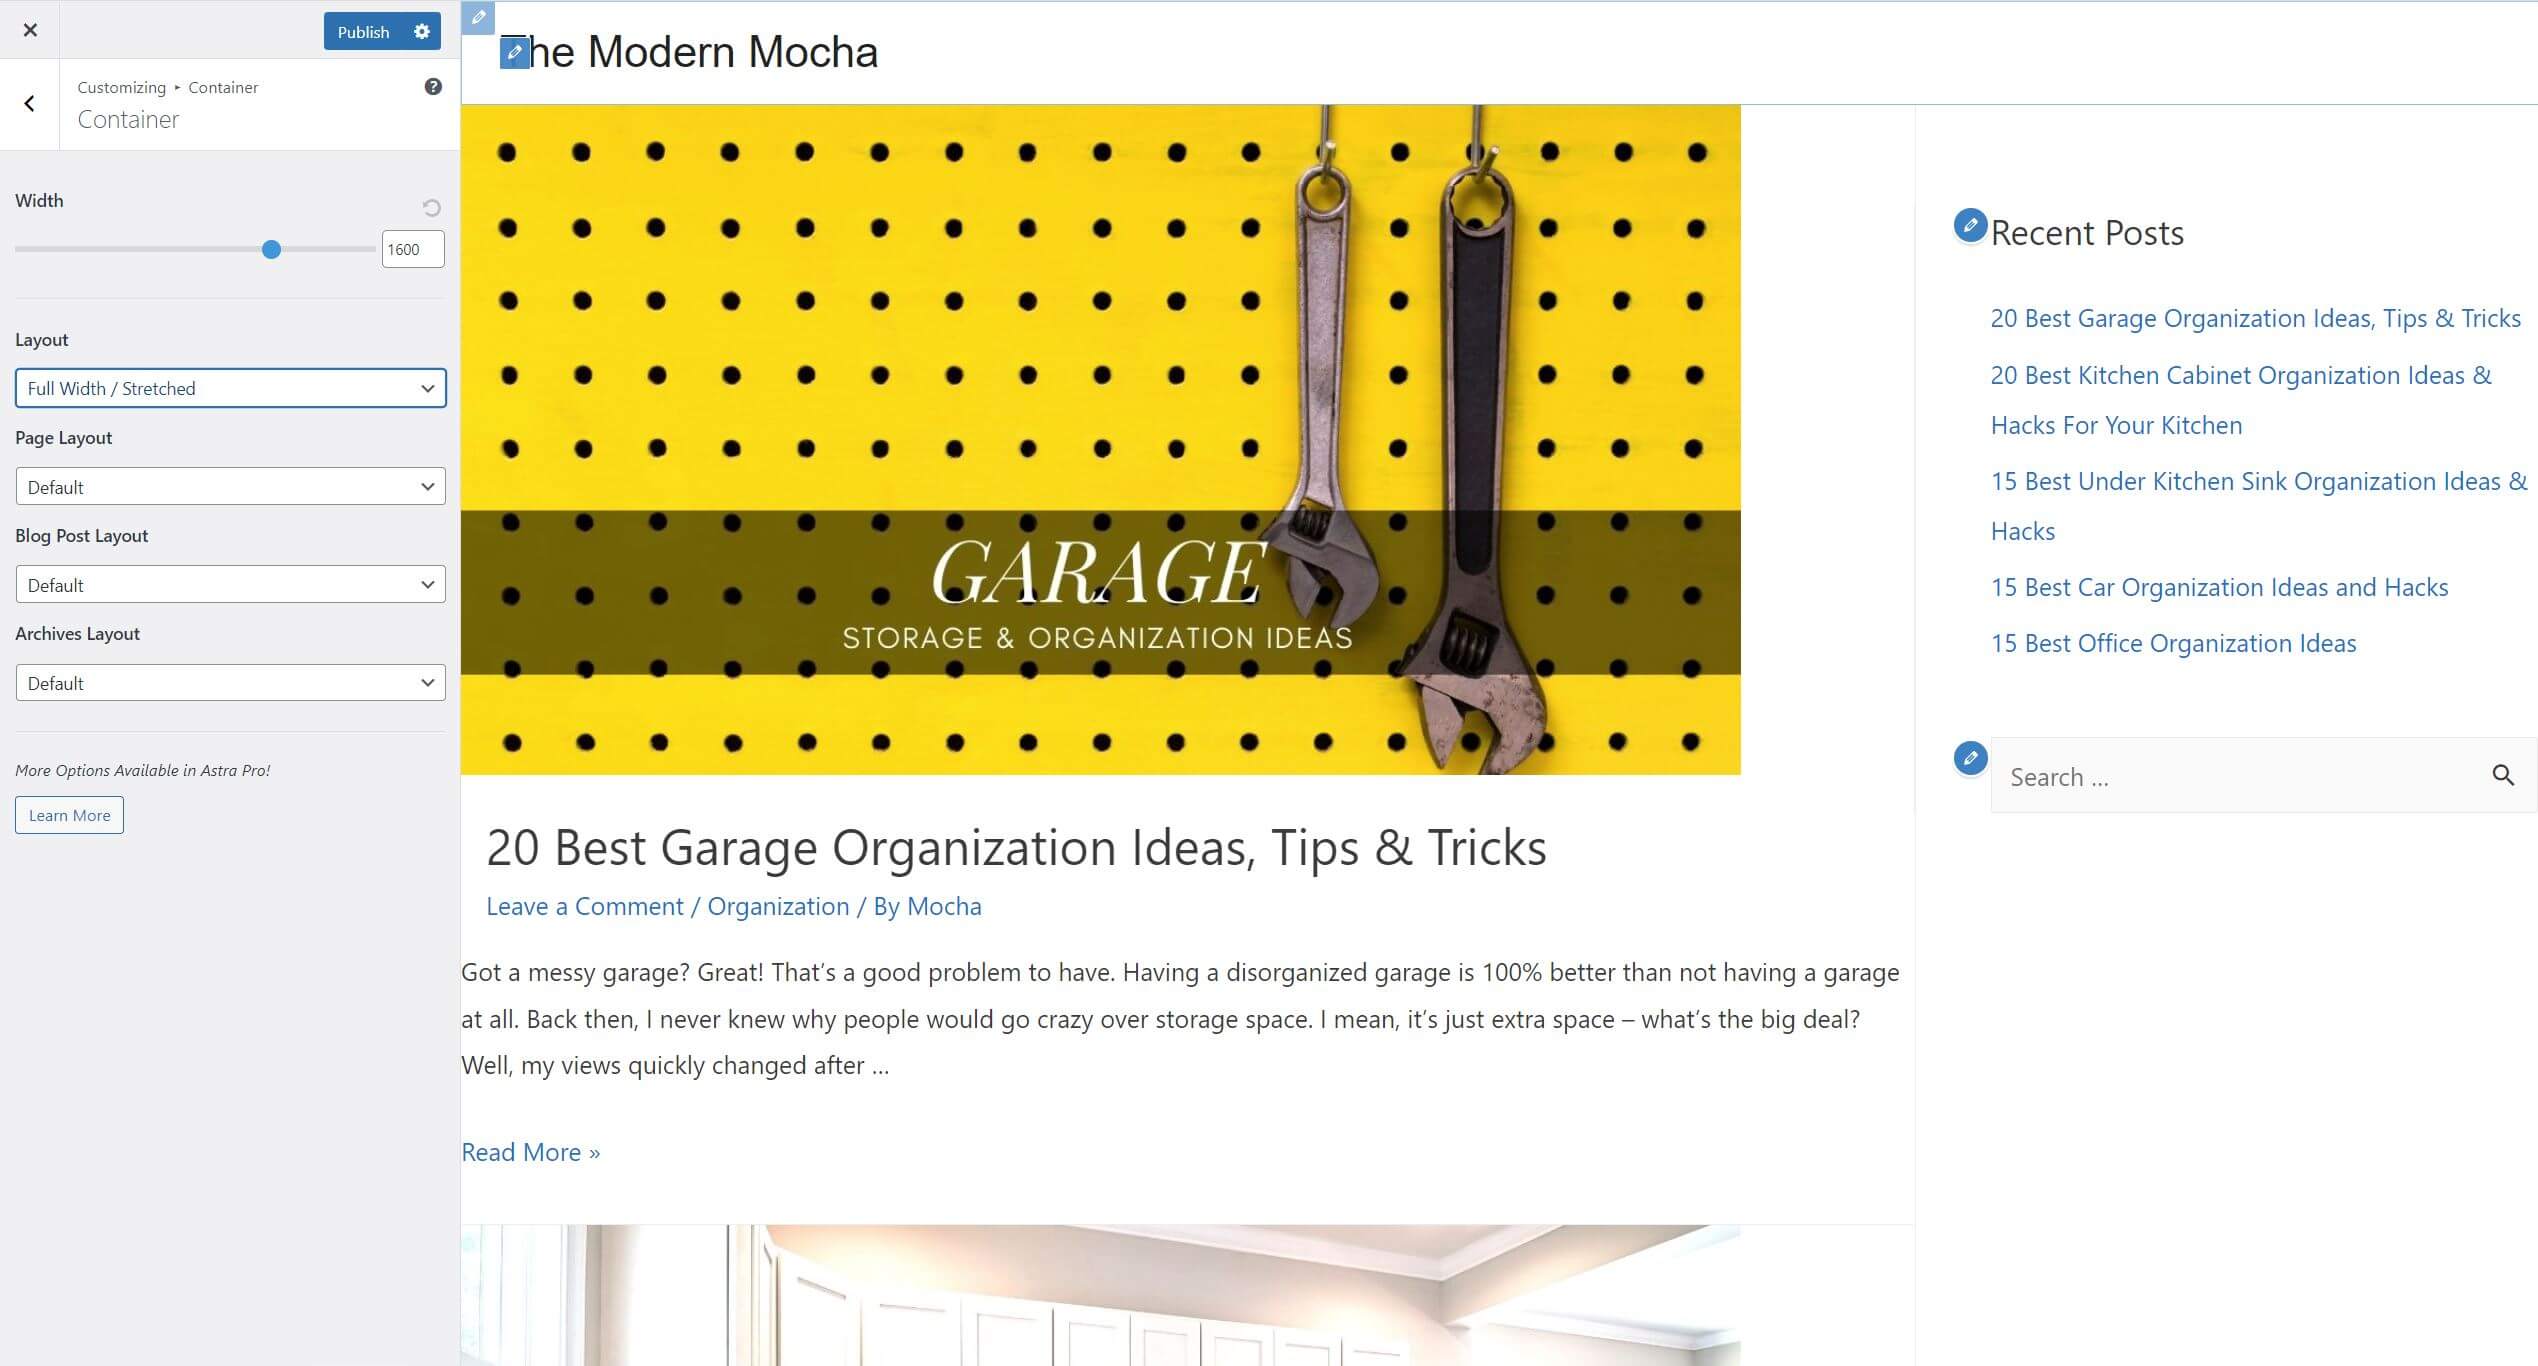
This is just how you like your overall layout to look, either boxed or stretched.
For The Modern Mocha, I am using the “Boxed” option, which you can see my post is in a “boxed” place if you check out my homepage. This is the “default” setting and I personally like it better than the other choices.
You can also try the “full width / stretched” option, which would give this appearance on your blog roll:
Header Builder (includes the logo or blog name):
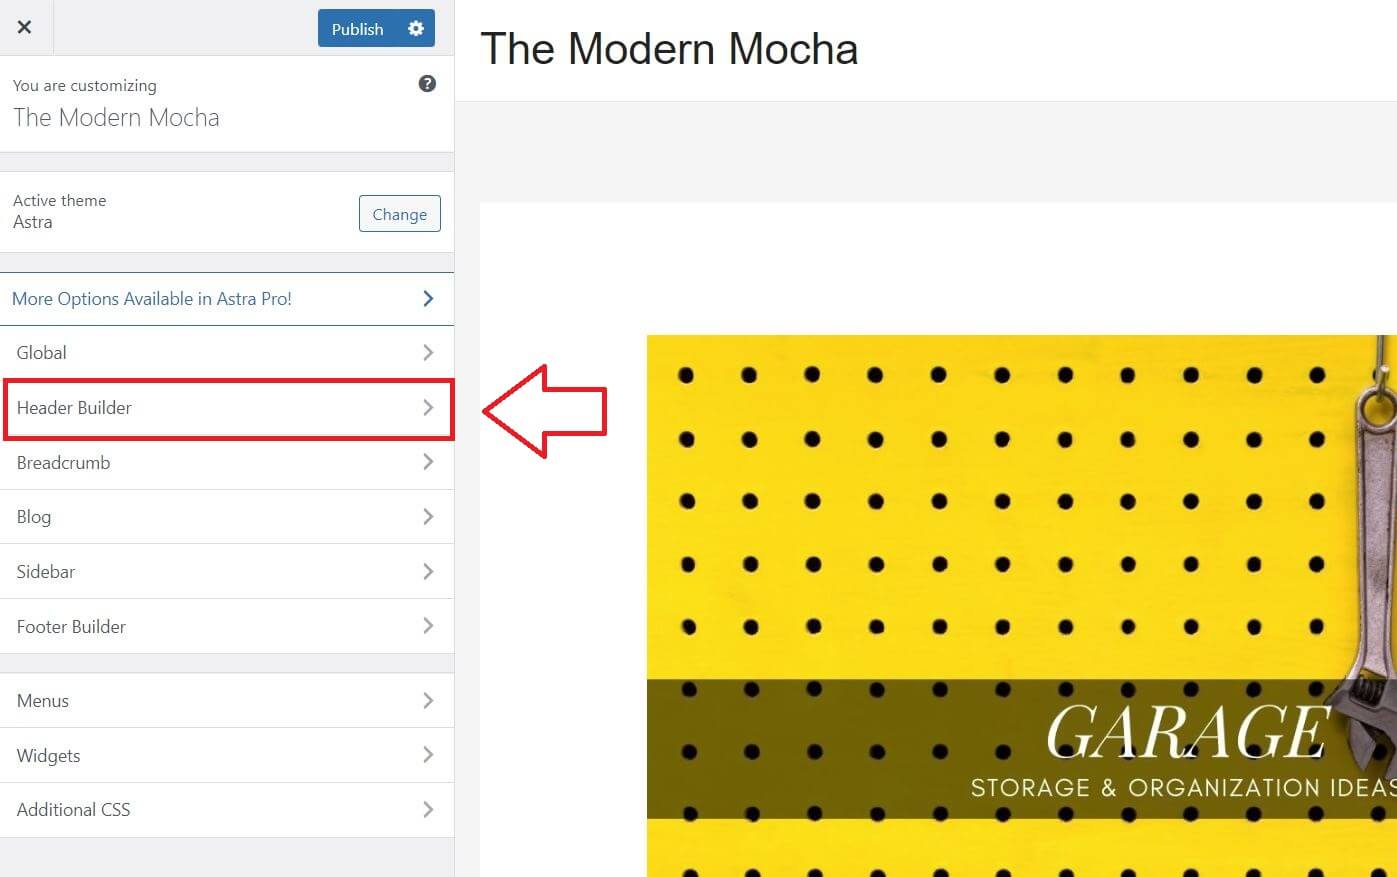
With Astra Theme, you can quickly and easily create your own custom blog header with the “Header Builder”.
This feature allows users to customize their blog’s branding, including logo placement, title font size and color, menu location, and more.
By taking advantage of the “Header Builder”, you can create a unique and eye-catching blog header that will help draw visitors to your blog. However, you don’t need to make this fancy when you first set up your website; you can always come back and make changes later on once you figure out how you want your logo to look.
For now, just type in your blog name along with your site tagline.
What is a site tagline?
A site tagline is a brief sentence or phrase (no more than 15 words) that helps your readers understand what your blog is about. When crafting your site tagline, make sure it’s concise, memorable, and relevant to your audience.
For example, for The Modern Mocha test site, I used the tagline, “Home organization and simple living made easy.”
This allows readers to know that the blog will focus on home organization and simple living tips, without needing to read further. By using an effective tagline, people can quickly decide if the blog is a good fit for them.
Always keep the intended audience in mind and craft your message accordingly.
Now, to input your blog name and tagline, go to Header Builder >> “Site Title & Logo” under Elements tab >> “General” tab.
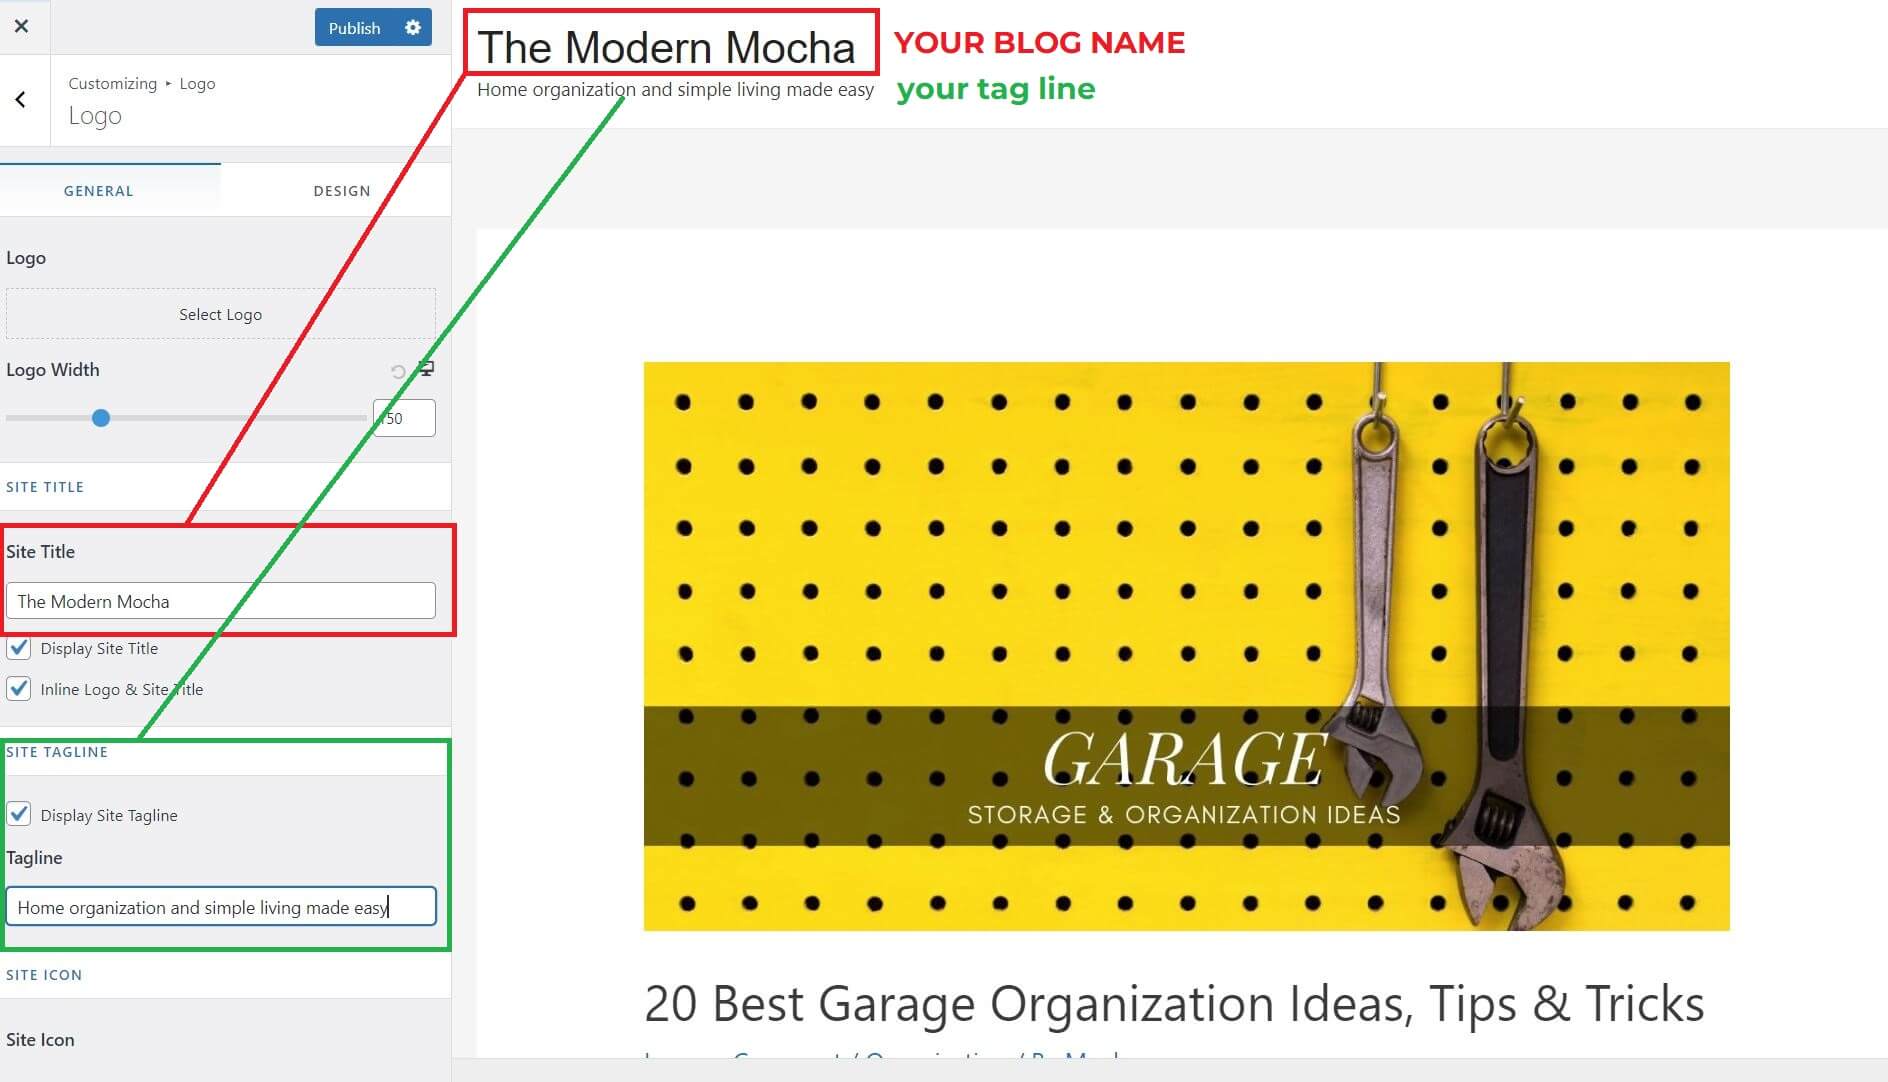
NOTE: You’ll notice a button called, “Select Logo”. If you’re using a program like Canva to create a logo, you can simply use this button to upload your image or logo. I personally recommend keeping this simple for now because it will allow you to spend time to get started on your blog post, which is one of the most crucial parts of building your blog. You can always create a logo 3 months down the road. There is really no rush since nothing is more important than generating content for your readers.
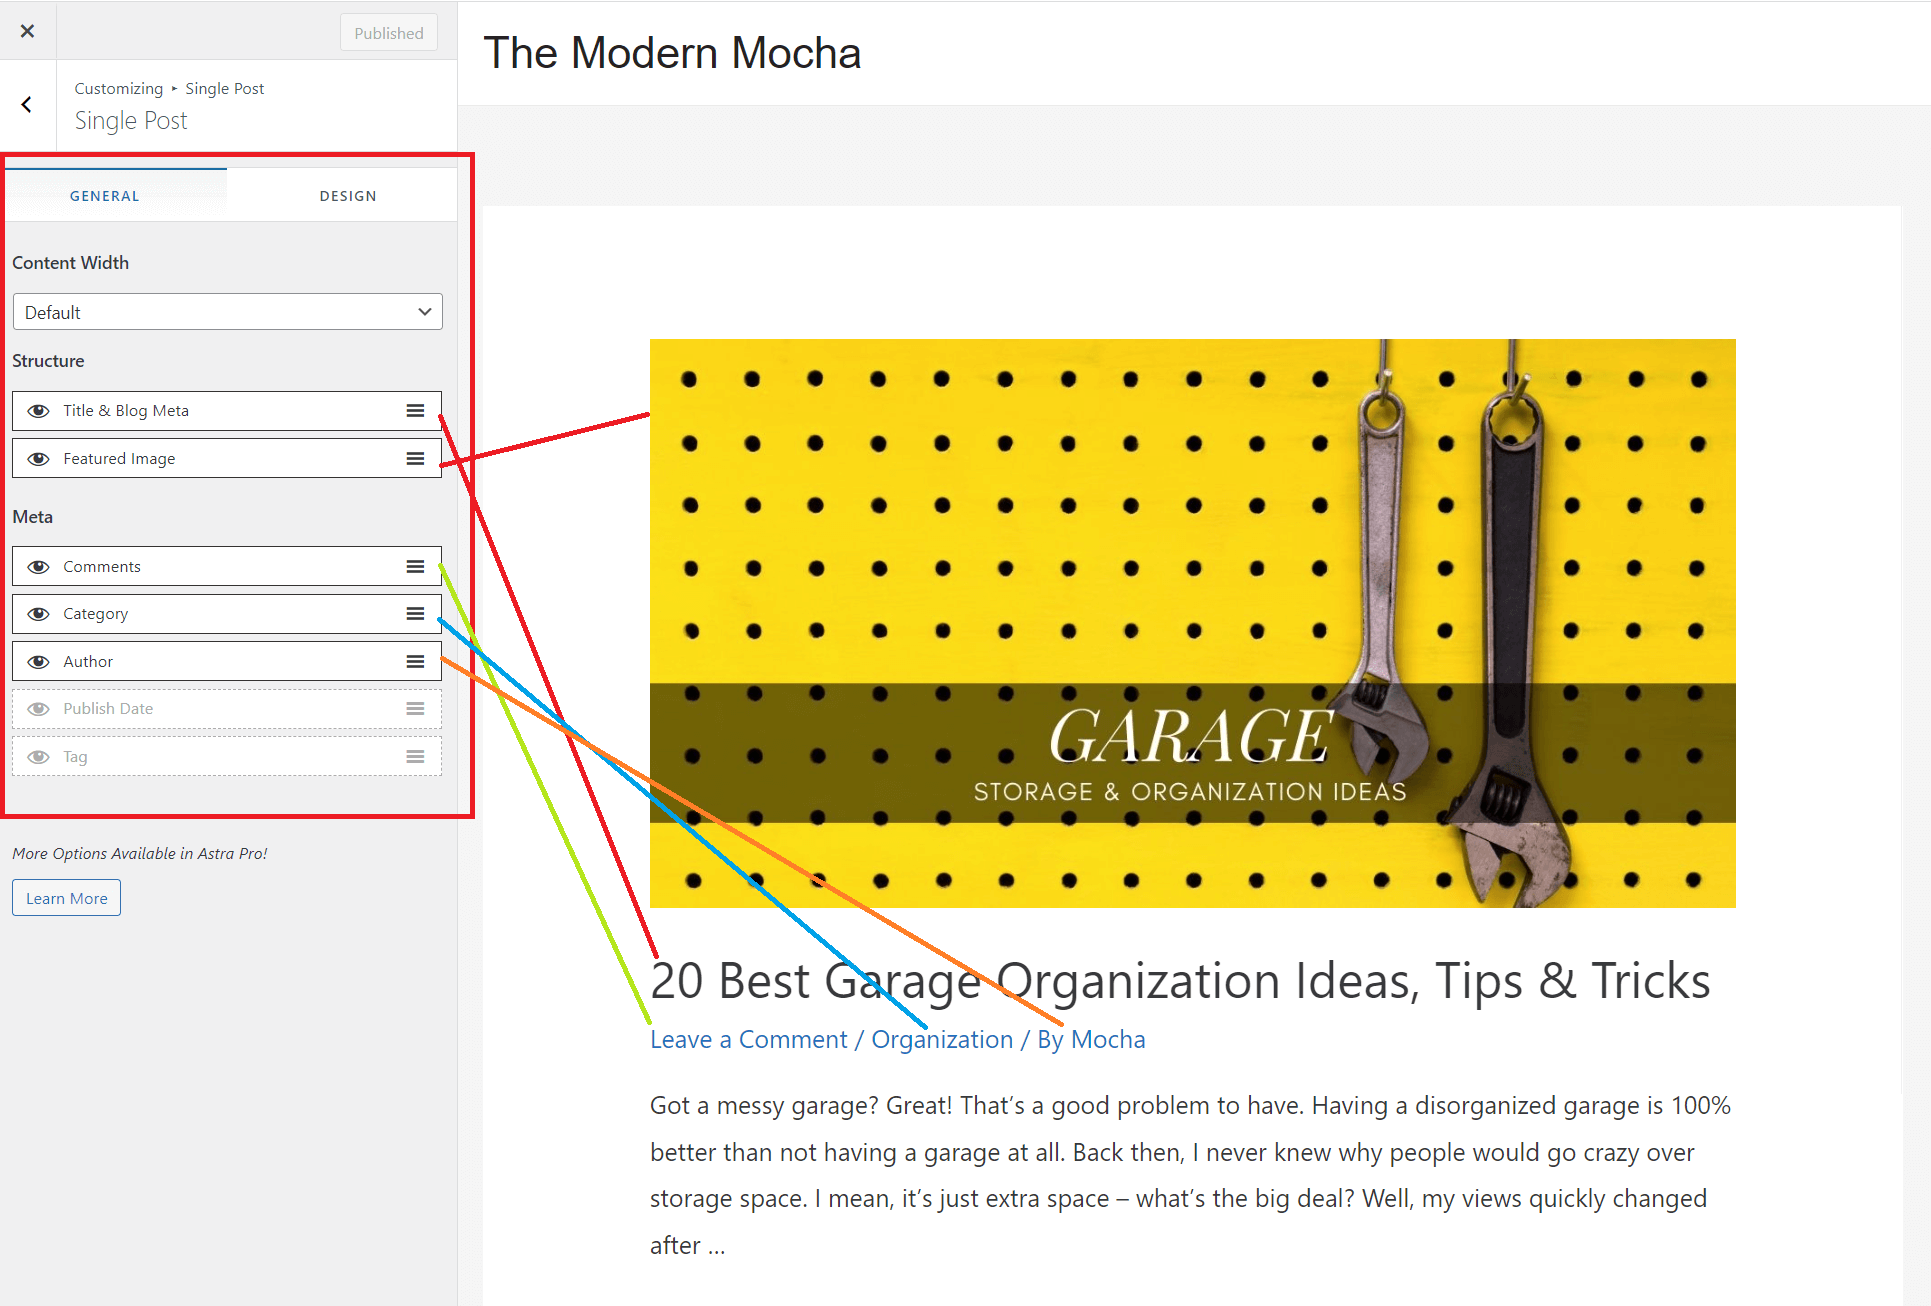
Blog (“Blog / Archive”):
This allows you to switch the position of where you want to place your blog title and feature image, along with the number of comments, category, and author. You can see the image below to visualize this setting.
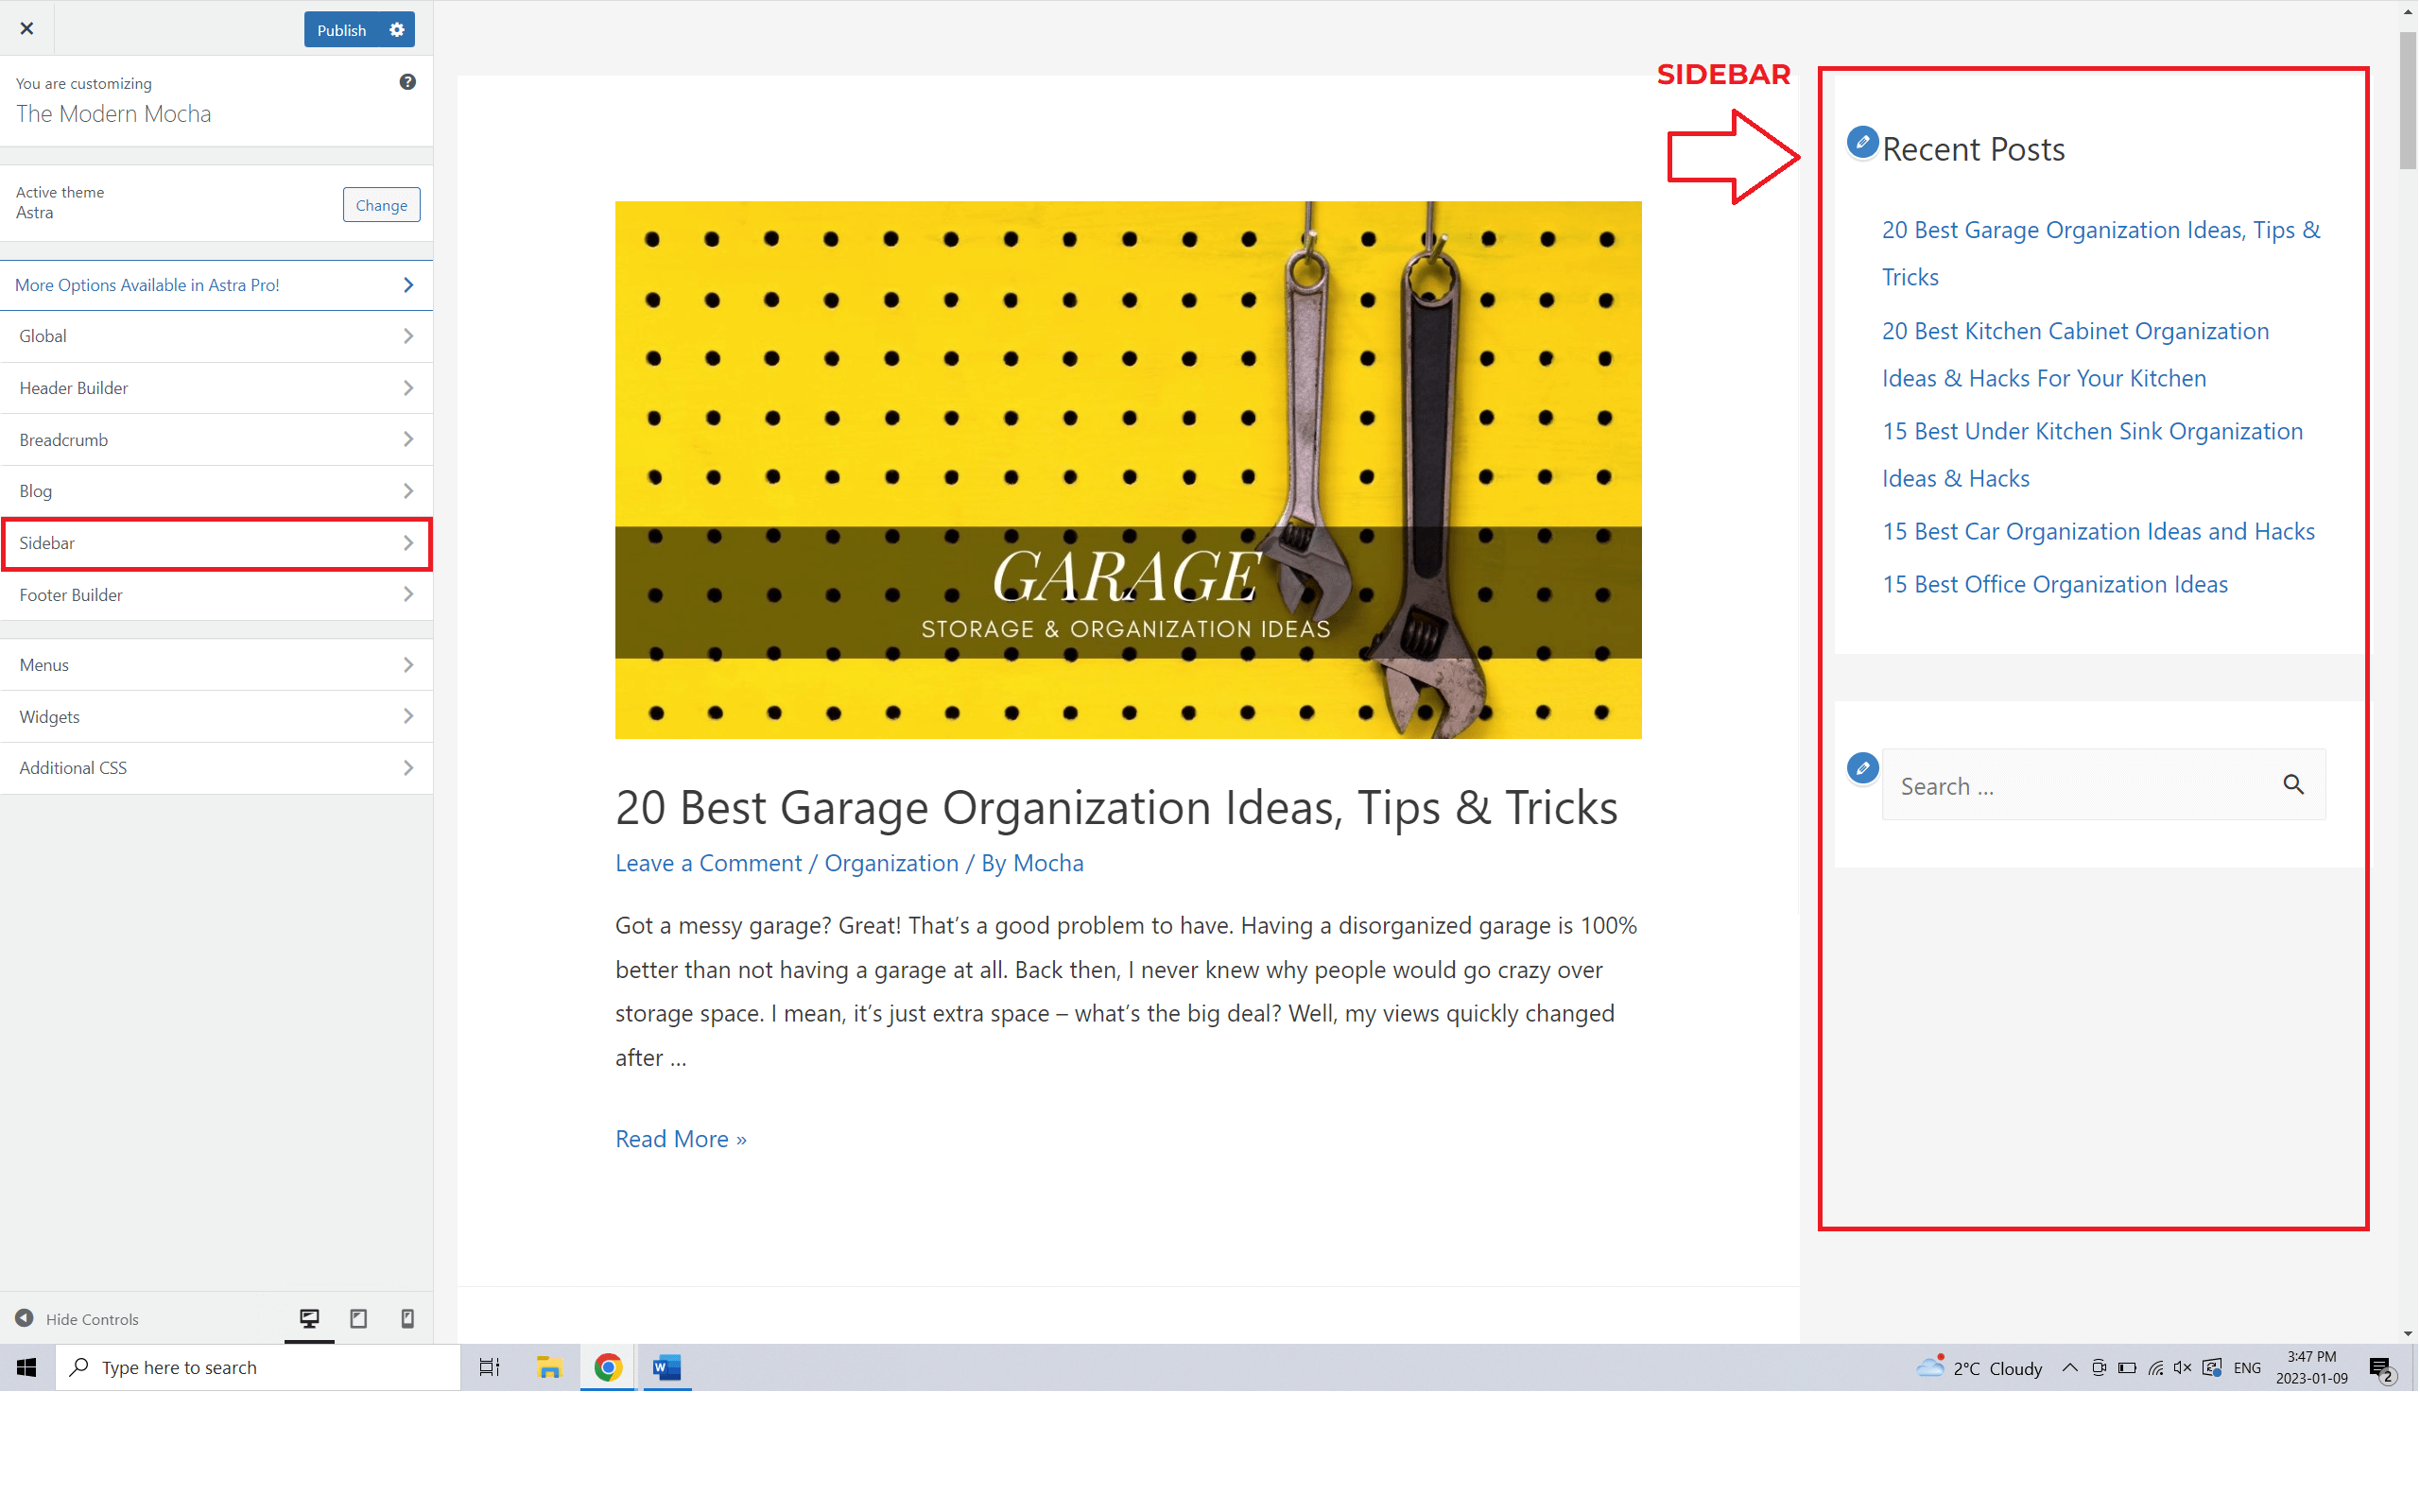
Sidebar:
The sidebar allows you to input your widgets for your blog page. You can choose to hide or show the sidebar, depending on what type of layout you are looking for.
You can select, “Right Sidebar” in the Default Layout option to allow the Astra theme to make room on the right-hand side for things like a search bar, bio or profile, your recent blog posts, links to your top articles, or even links to the products you want to direct your readers to.
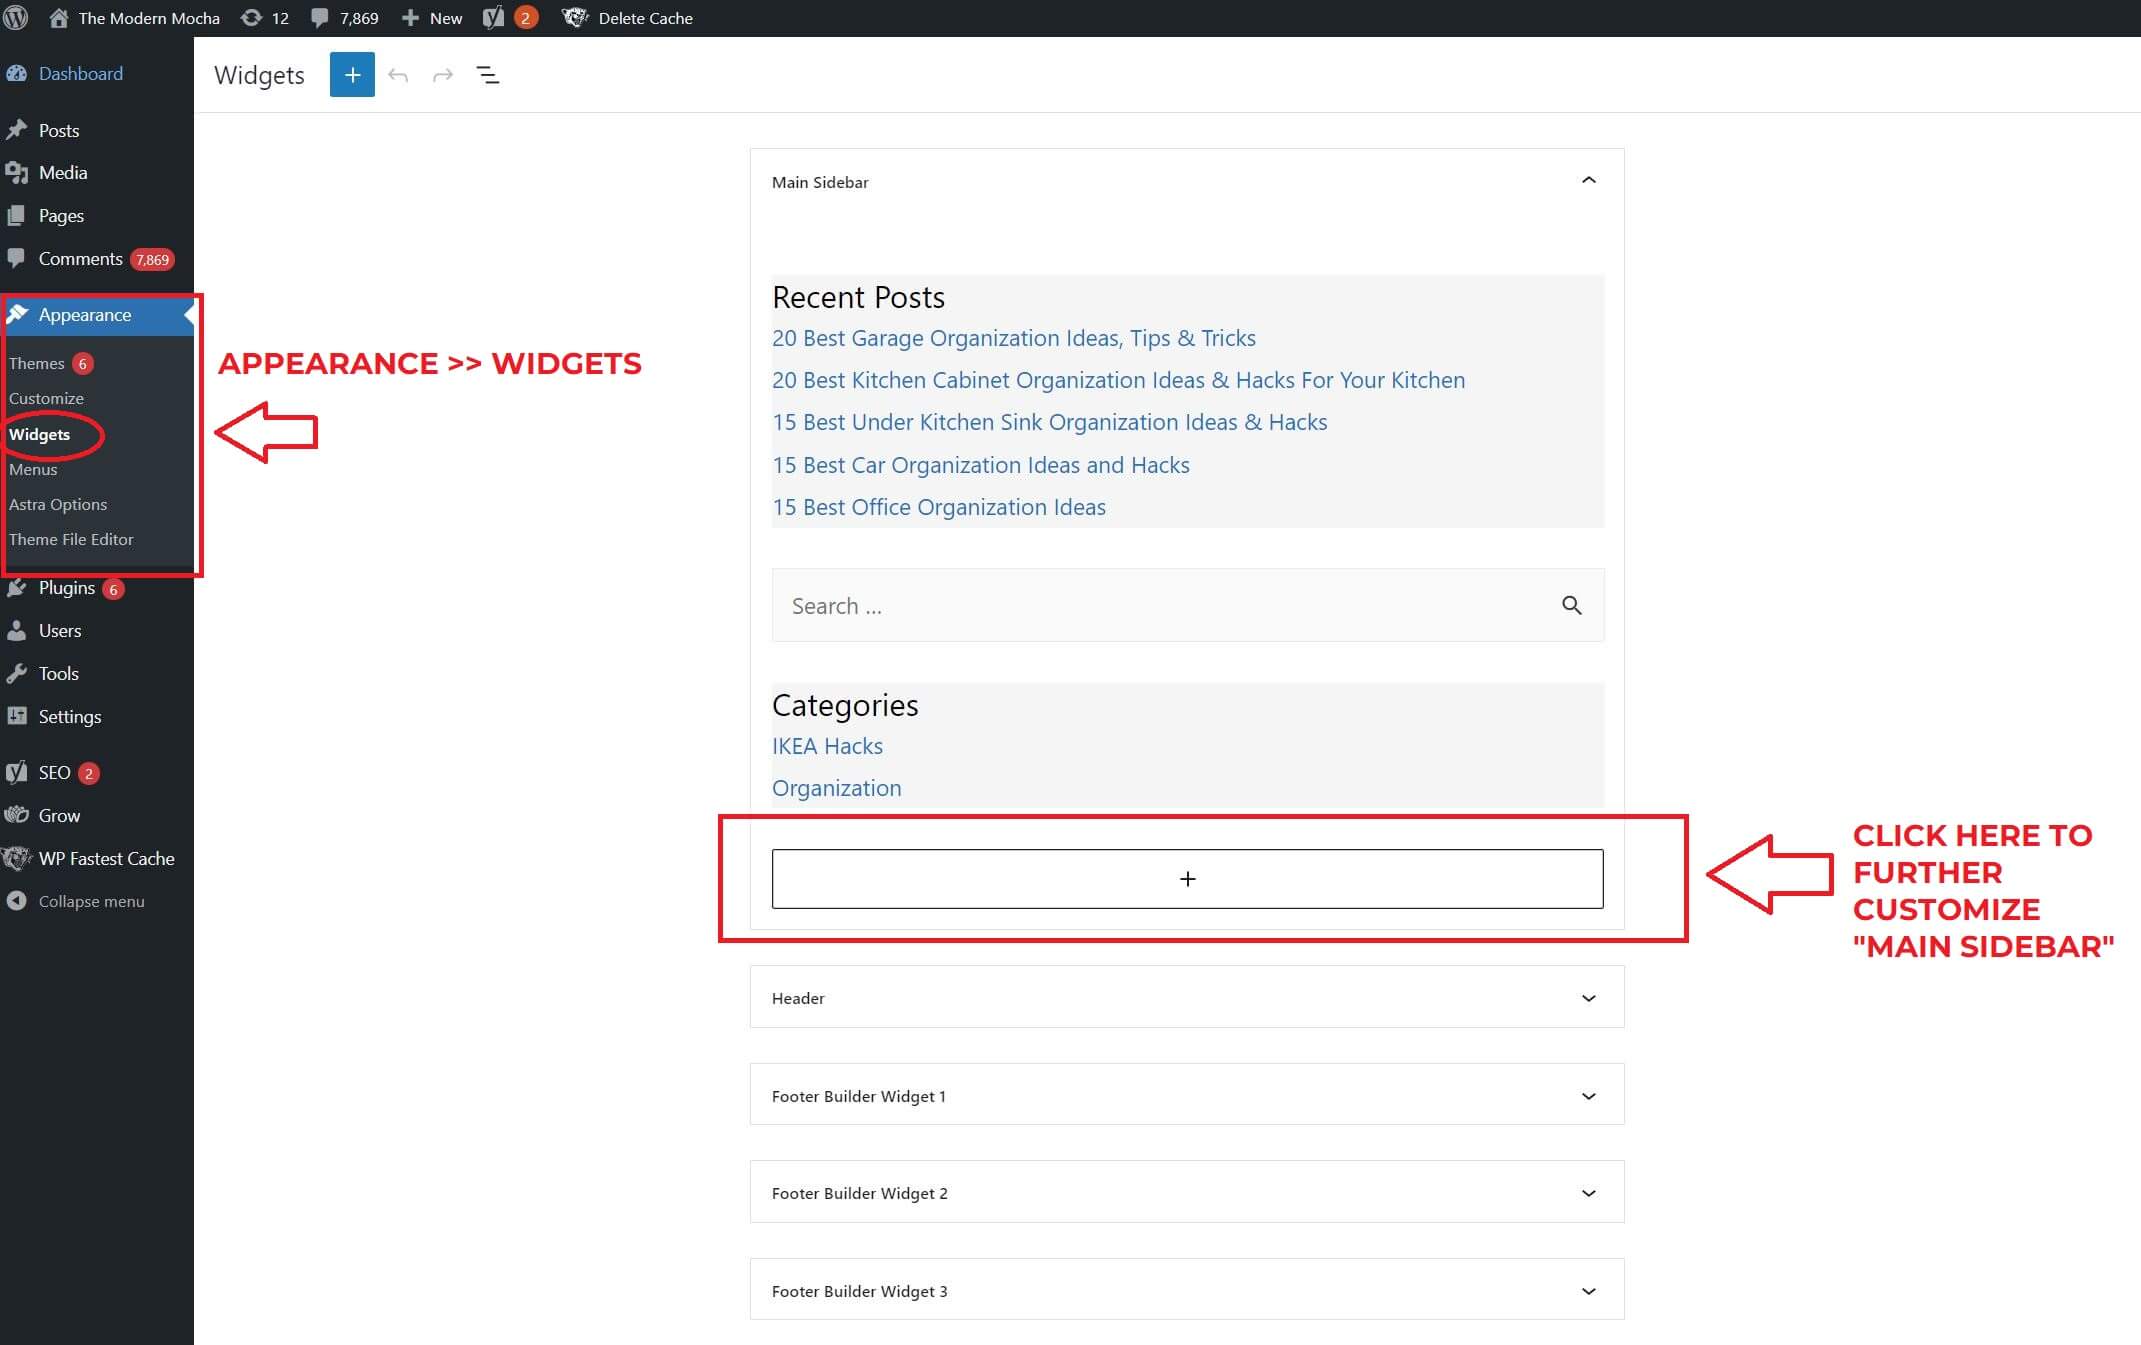
Sidebar customization: To customize the sidebar, you can go into your WP dashboard and select “Appearance” then “Widgets”.
From here you can drag and drop widgets into the sidebar. This method gives you more flexibility and customization options.
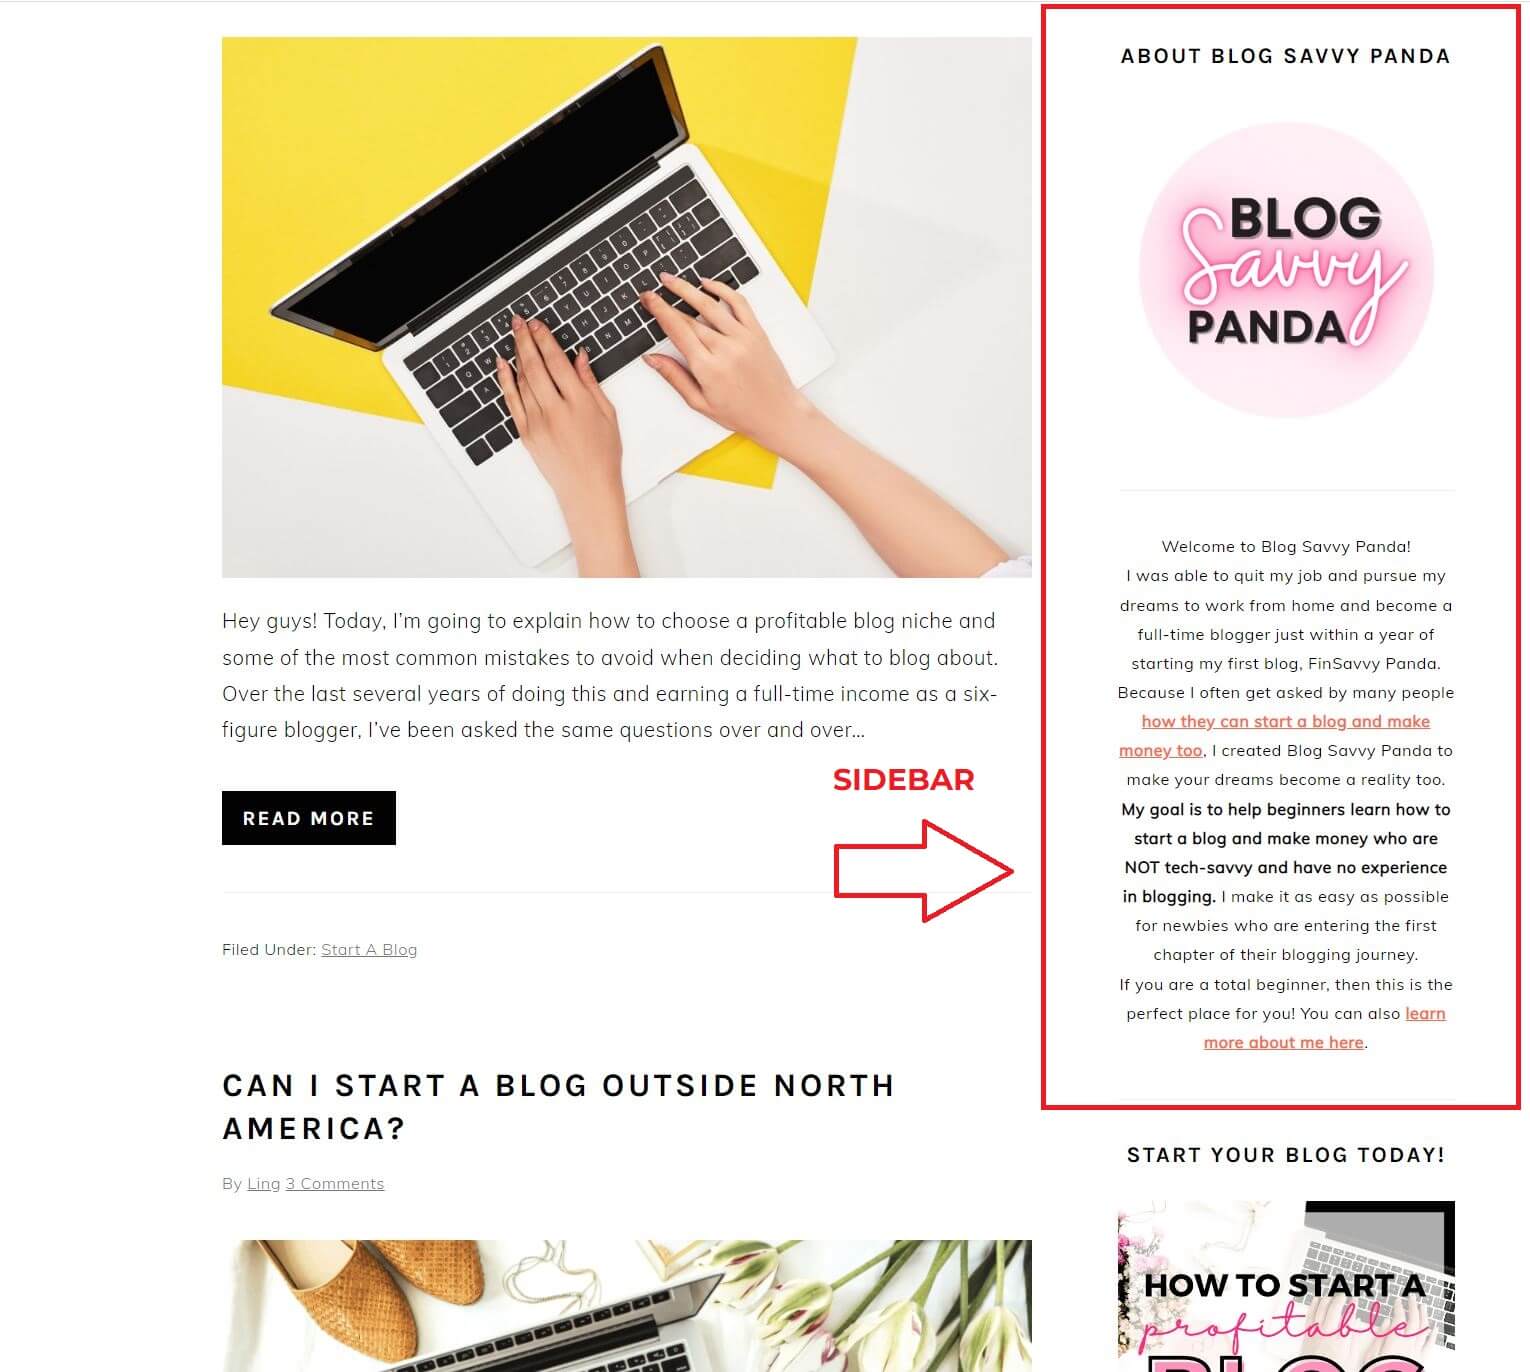
This is how the sidebar of Blog Savvy Panda looks when I use the “Widgets” to customize it. I used the image function for my logo and the text/paragraph function for a short “About Me” section.
How to insert a profile, image, or logo into your blog’s sidebar:
Let’s say, for instance, you want to insert a profile, image, or logo into your sidebar.
First, go to “Appearance” >> “Widgets” from your WP dashboard.
You’ll see your Main Sidebar or Right Sidebar.
Next, click on the “+” button, and then select the “Image” icon.
![]()
Selecting the “Image” icon will allow you to upload any image or logo you choose from your computer/desktop.
Make sure to hit the “Upload button” to do this.
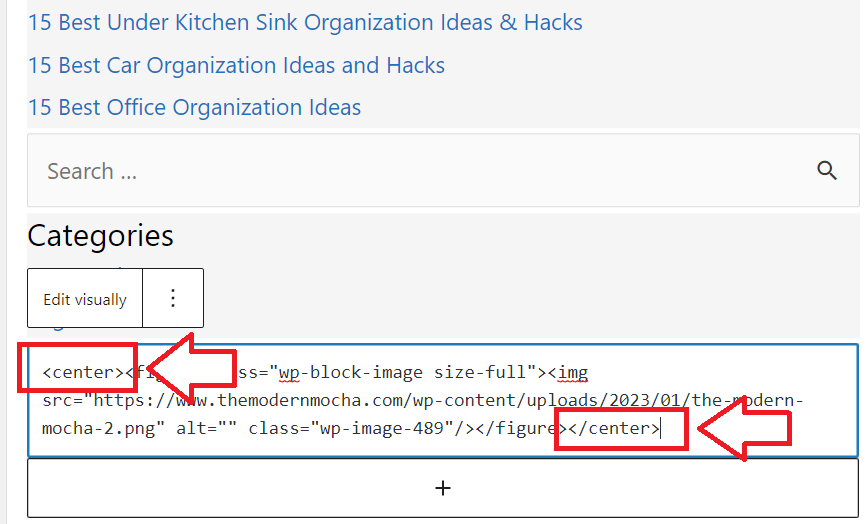
After choosing your image or logo, you’ll see this button with three dots – click on that because we want to select “Edit as HTML” so that we can insert a basic HTML code to center your profile image or logo (or else the image would be aligned to the left as default).
![]()
Now, you can type in <center> at the beginning of the code, followed by </center> at the very end to close it off.
It would look something like this:
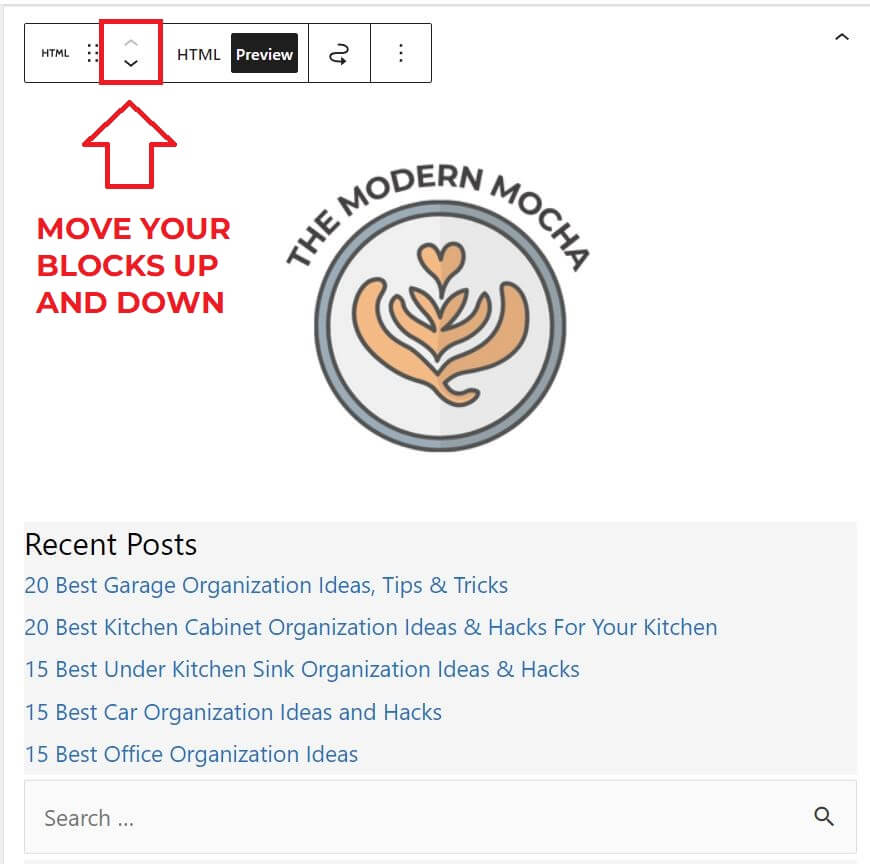
Once you’ve done that, your image or logo will be centered:
![]()
Note, you can move your blocks up and down by clicking the arrows to arrange the placement of your image, links, text, and other categories, etc. It typically makes sense to place your profile image or logo first, so go ahead and shift this all the way to the top.
So far up to these steps, these are the basics you need to cover, so you can focus on writing your blog posts. I also have an article on how to write your first blog post here.
Creating a Blog Menu with Astra Theme:
A blog menu is an essential item for any blog. It makes it easier for readers to browse through your content and provides an overall better experience.
Here is an example of how a blog menu looks on my website, FinSavvy Panda.
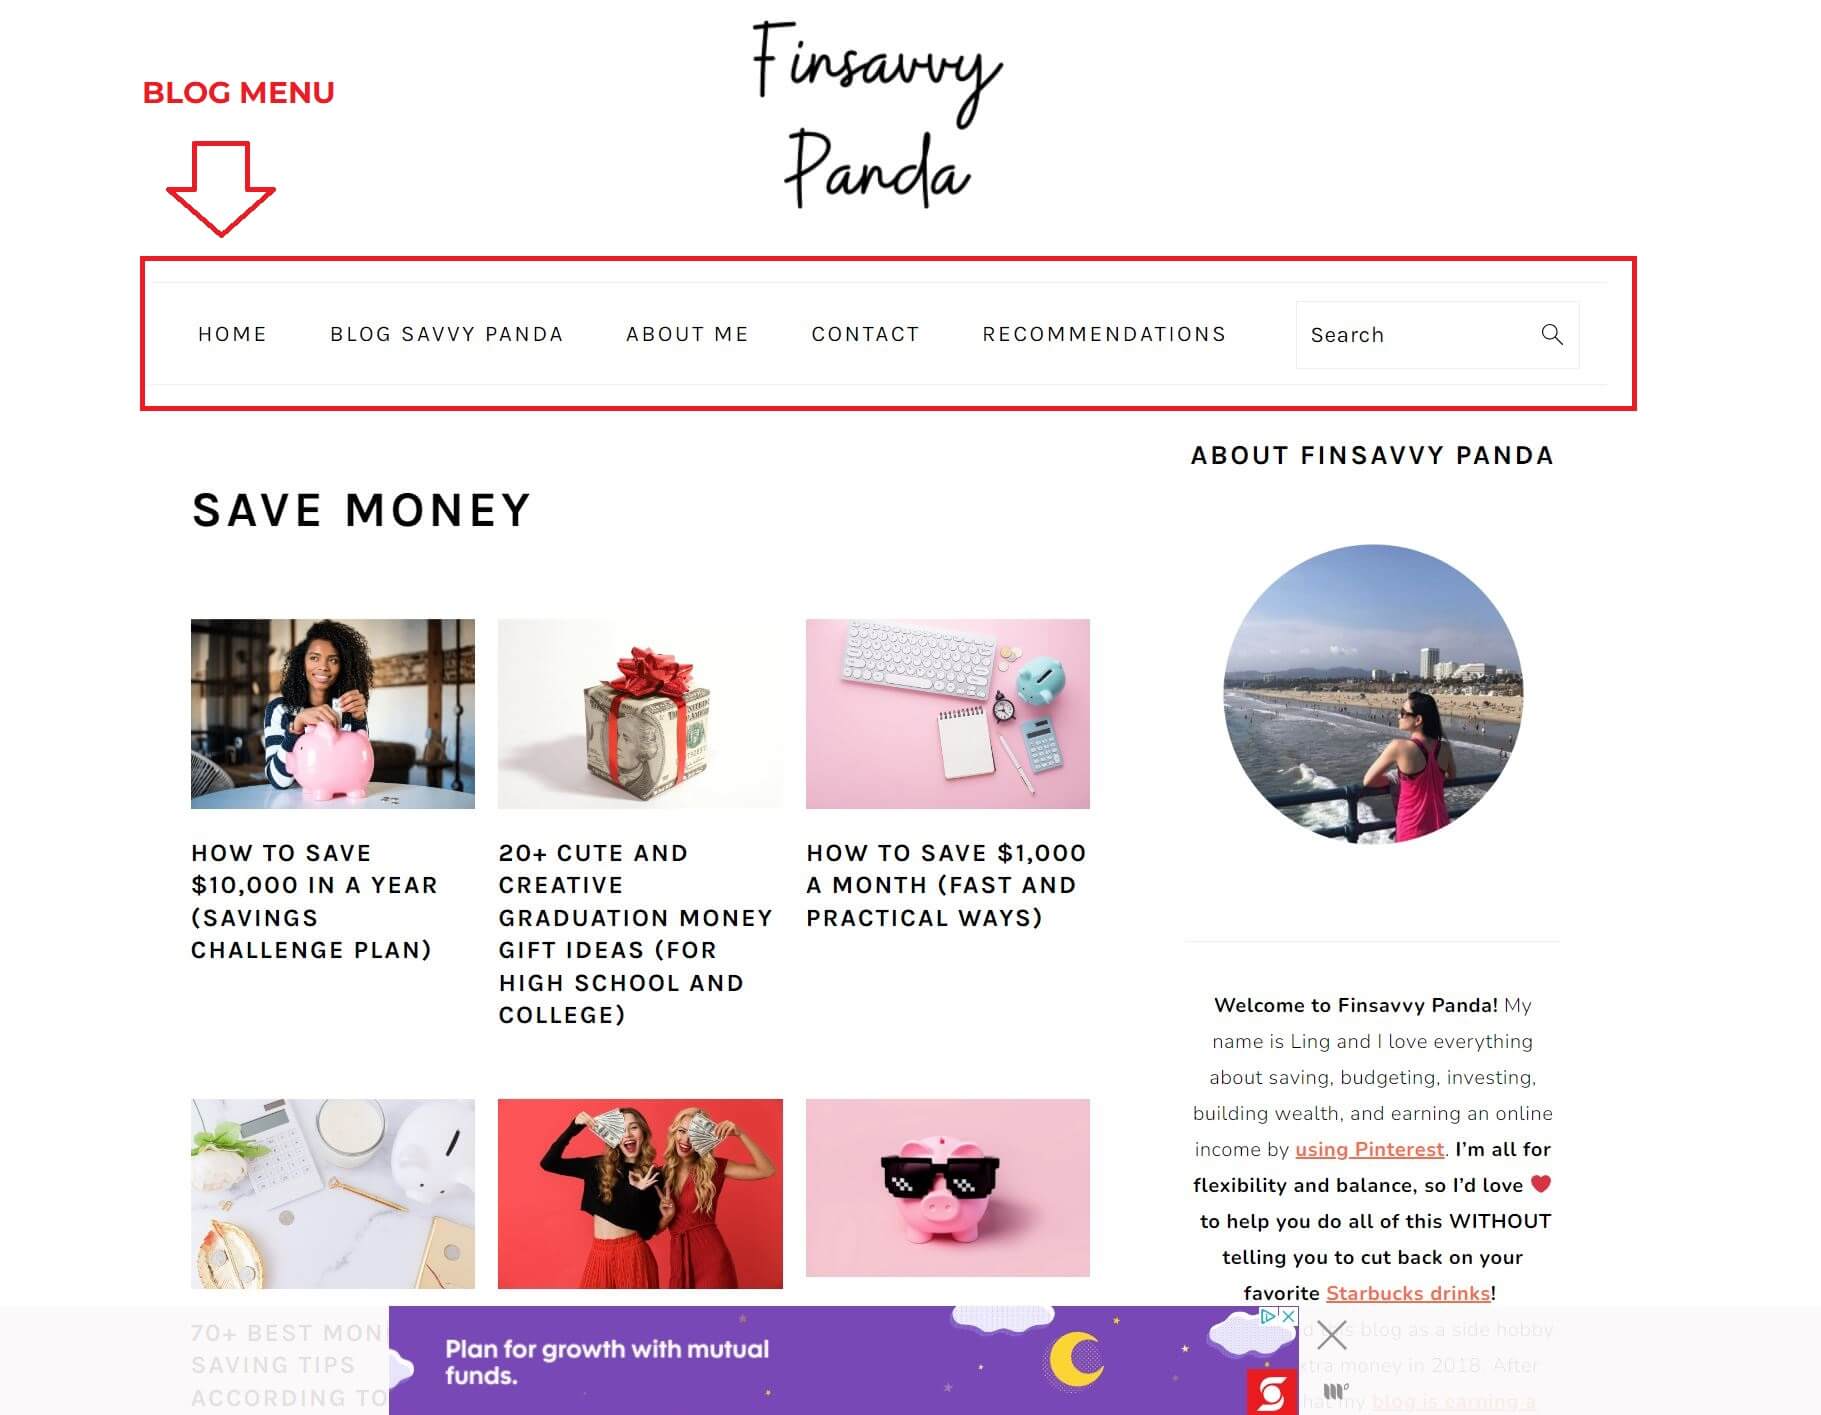
Once you’ve written at least 10 blog posts, I want you to create your blog menu. This is no rush at all, so take your time.
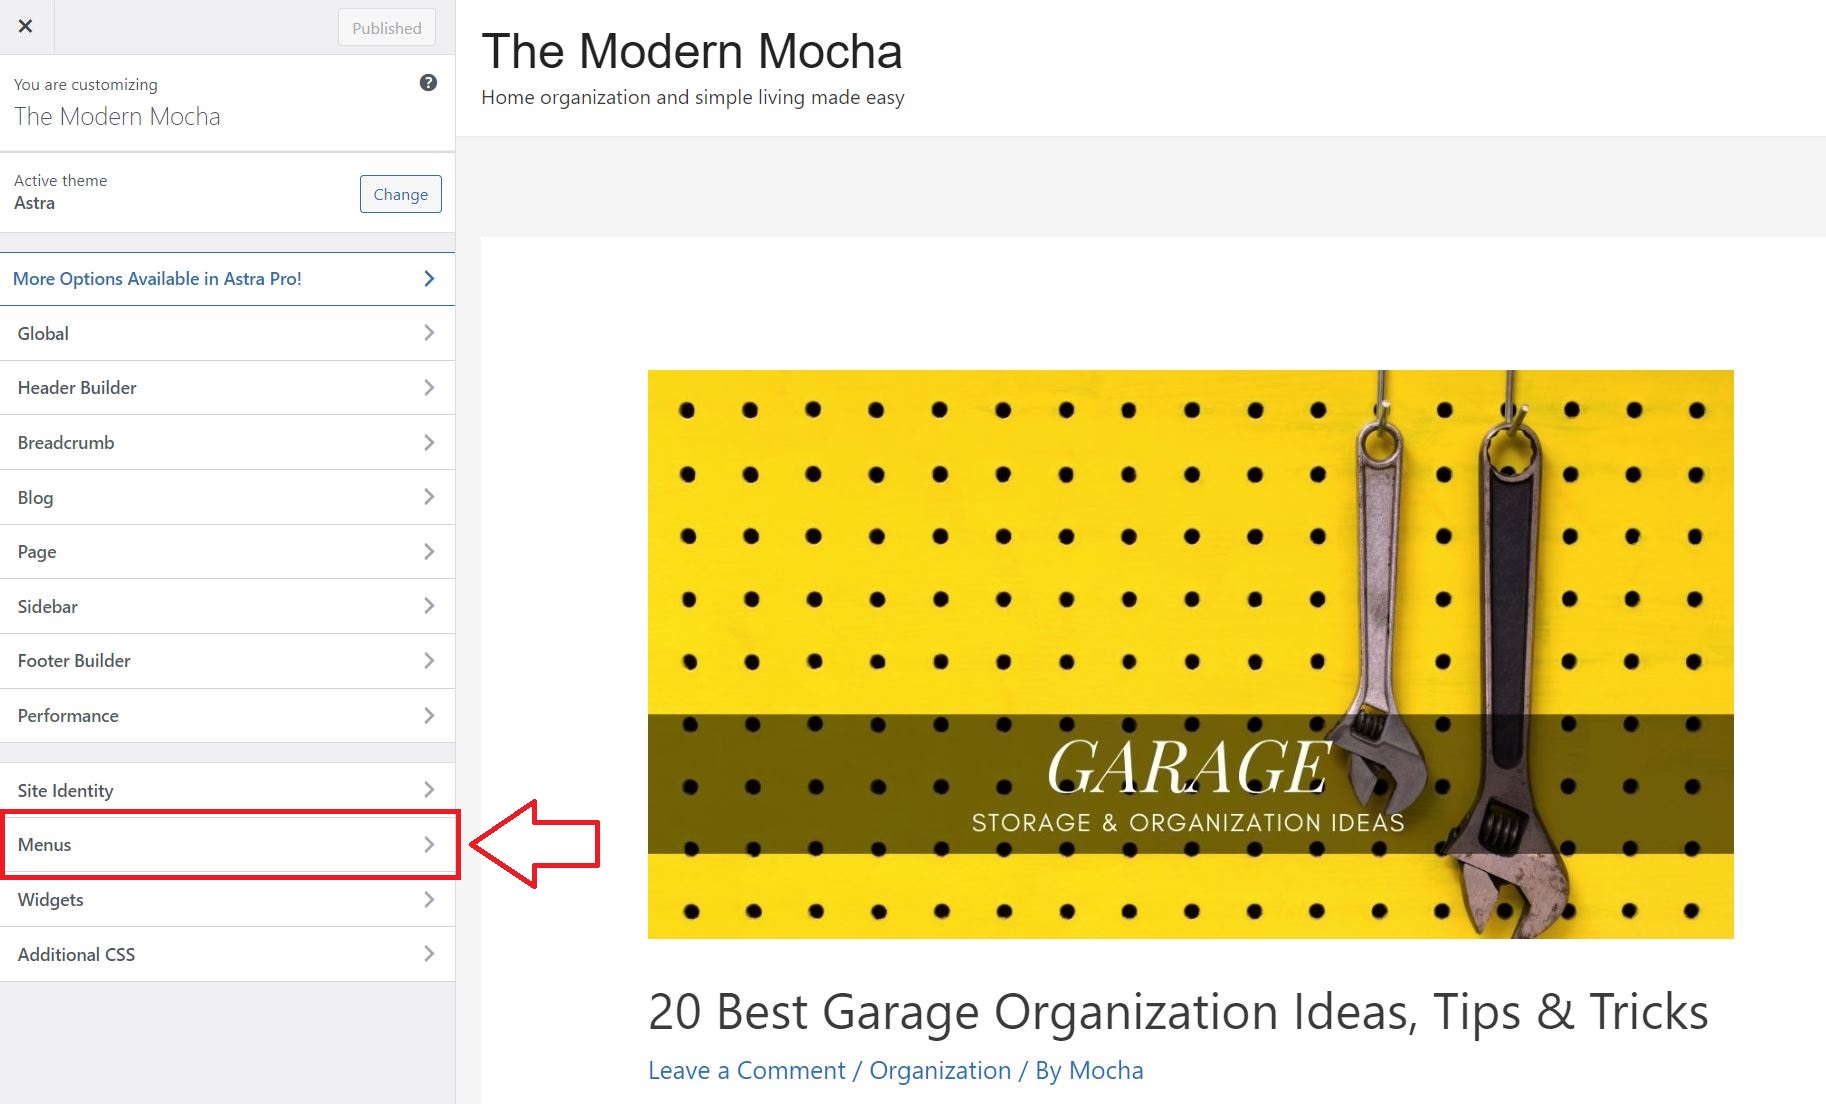
With Astra Theme, you can easily set up a blog menu from the “Menus” category. Here you can add items to your menu such as About Us, Contact Us, and other categories as you wish.
A blog menu is what I teach in my next tutorial. So, stay tuned!
Hi Ling.
I actually haven’t set up my blog yet. And it’s been a year now. Everything stopped for me when I needed to choose my blog theme – just like you’re describing it in the post.
I started well and almost finished my first blog, but then It all stopped and I basically haven’t done anything since then.
But, just now – I am really determined that I’ll set up my blog and would love to do it asap.
I’ll go step by step using your instructions and hopefully it will work. I printed out all your tutorials from last year and I hope they are still OK – that things haven’t changed much since then…
Thank you. Have a nice day.
Best regards,
Staša
Hi Staša – welcome back to blogging after taking a break. I look forward to seeing you set up your blog soon.
You’re right. Nothing has changed much since last year. All instructions should be applicable. If there are any significant changes, I would update the information.
Let me know how everything goes. While you are setting up your theme, don’t forget to follow every single step and strategy laid out in The Treasure Map To Blogging Success ebook:
https://www.finsavvypanda.com/blogging-success-ebook/
Again, I’m really excited to see a successful launch with your blog!