
This post may contain affiliate links. Please read our disclosure policy for more information.
In today’s tutorial, I am going to show you how to make and create beautiful Pinterest board covers!
The truth is you don’t necessarily have to create Pinterest board covers for your profile or account. Some people will tell you it’s a waste of time and that it doesn’t help you with bringing any traffic back to your blog or website.
Some, on the other hand, will tell you that it is a good idea to create Pinterest board covers because it makes you look more professional and helps you raise your brand awareness.
Overall, it doesn’t hurt to make Pinterest board covers. I personally make them for all my Pinterest accounts because it’s quick and easy to do!
If you ask me, I’d say creating these Pinterest board covers in your Pinterest account makes your profile more appealing and organized for Pinners and your followers.
Again, the good news is it doesn’t take long to make them. So, why not spend the next 10 to 30 minutes to make your profile look more appealing and organized?
The beauty is you only make them once and never have to touch them again!
How To Make Pinterest Board Covers
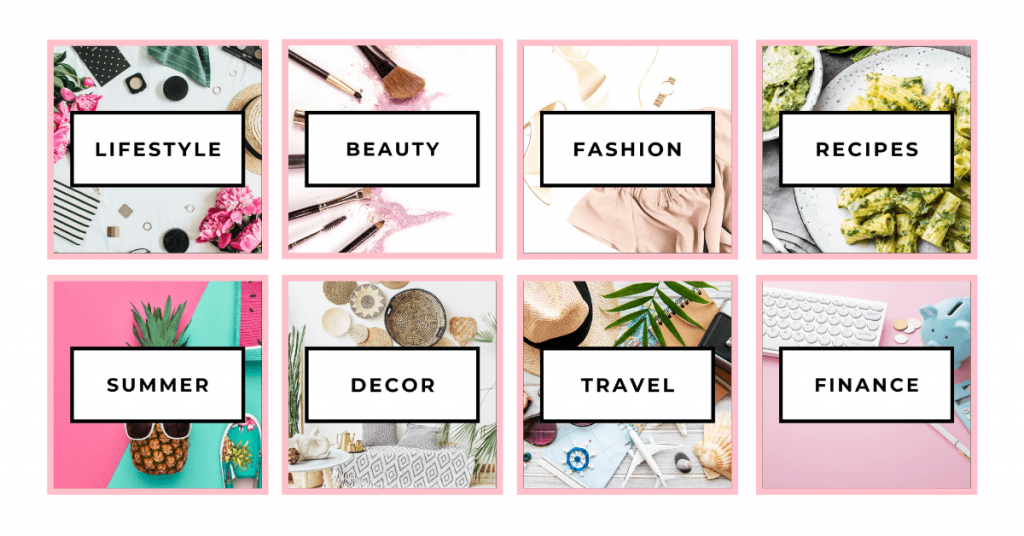
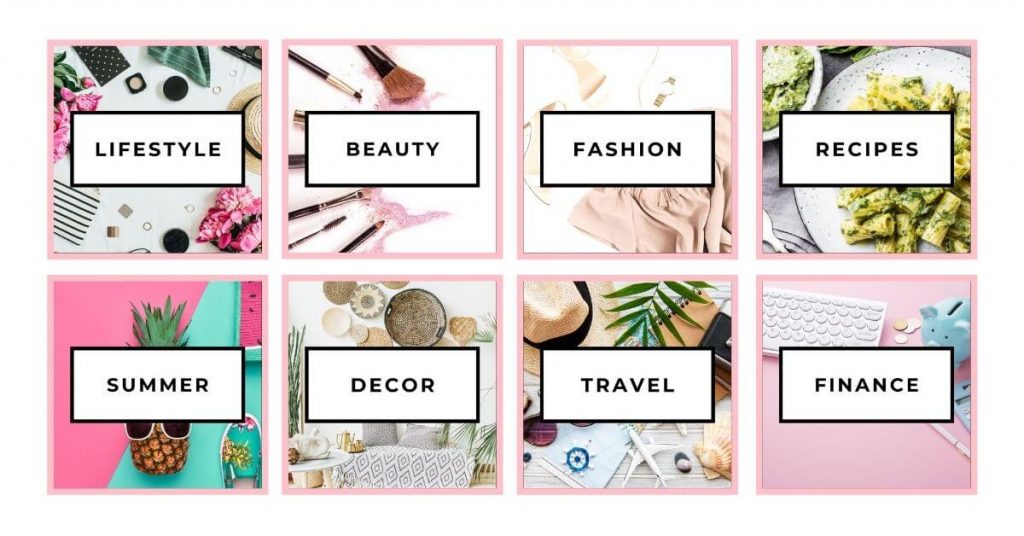
Here is an example of my Pinterest board covers for this blog, Blog Savvy Panda.
If you haven’t yet, don’t forget to follow my brand new account on Pinterest here for more Pinterest and blogging tips!

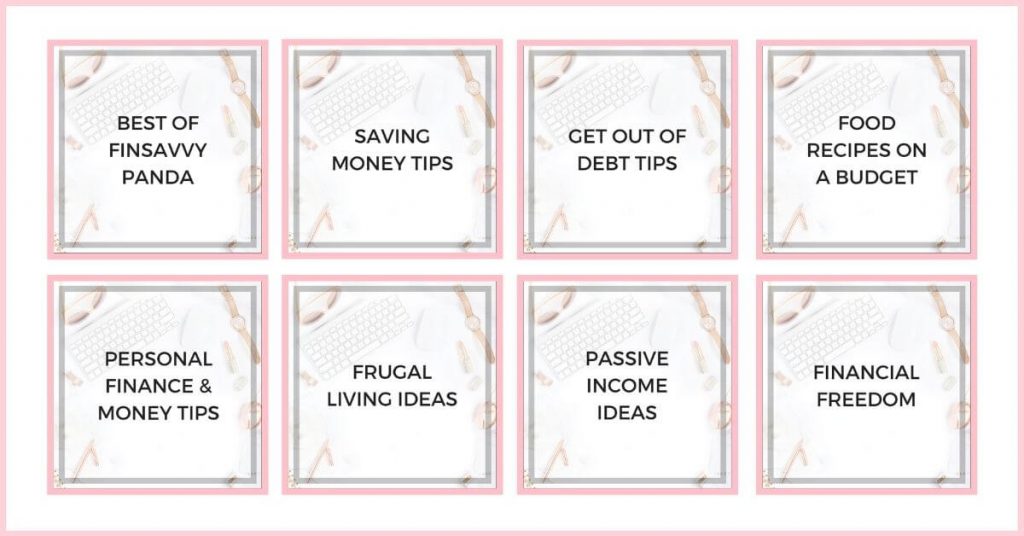
I also created blog covers many years ago for my personal finance blog, Finsavvy Panda, here. You’ll notice this looks much simpler and these ones literally took me less than 10 minutes to make!
In this tutorial, I’m going to teach you how to make simple, yet beautiful board covers for your Pinterest profile using this style. This style is really fast and easy to create in just minutes:
You can always use what you learned in this tutorial and make tweaks to add your own personal touch and style.
By the way, I also have an archive here with a collection of Pinterest tips for new bloggers, so you can check that out too.
Create and sign up for a Canva account first!
If you haven’t created a Canva account yet, I highly recommend you to because it’s what we’ll be using to make your pretty Pinterest board covers. What I love about Canva is you don’t have to be a design pro or have experience in design to create something beautiful.
I am personally using the Canva Pro version because it gives you unlimited access to better tools and premium stock photos. You also get 100GB of cloud storage space, whereas the free version is only 5GB, which you’ll use up really fast.
I used to use the free version of Canva, but later I found that my free account wasn’t worth my time anymore because it was very challenging and hard to look for beautiful and professional images for my designs. On top of that, it didn’t give me the option to create folders to organize my work – the Pro version instantly solves this problem!
It’s definitely worth the investment, and I am very confident that you’re going to love the Pro version as much as I do! The great thing is it’s affordable at a low monthly rate, or you can pay on an annual plan and save more money!
👉 You can create your Canva Pro account here and get a FREE trial. If you don’t like it, you can simply cancel it!
Okay, assuming that you now have a Canva account, let’s get started with creating your board covers for Pinterest!
I am super excited to go through this tutorial with you! 🙂
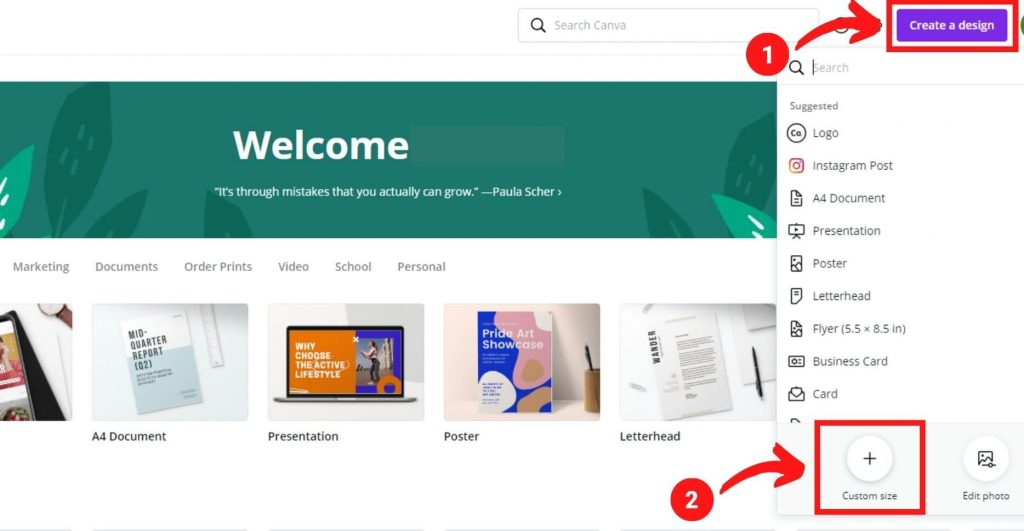
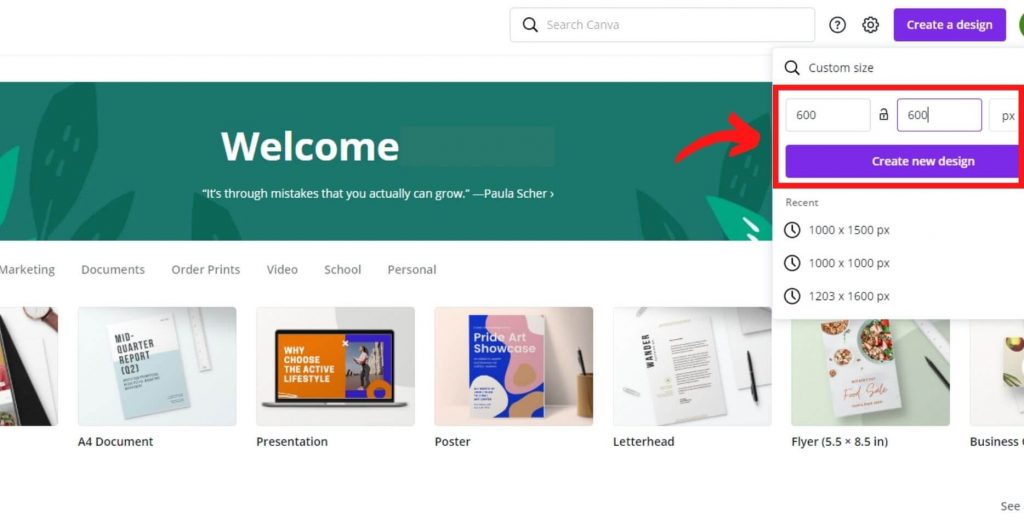
Step 1: Log in to your Canva account
Click on the purple button, “Create a design.”
Next, click on “Custom size” at the bottom.
Step 2: Decide on your Pinterest board cover size
Enter the size of your board cover and click on the “Create new design” button.
I generally prefer 1000 x 1000 PX, but you can do 600 x 600 PX.
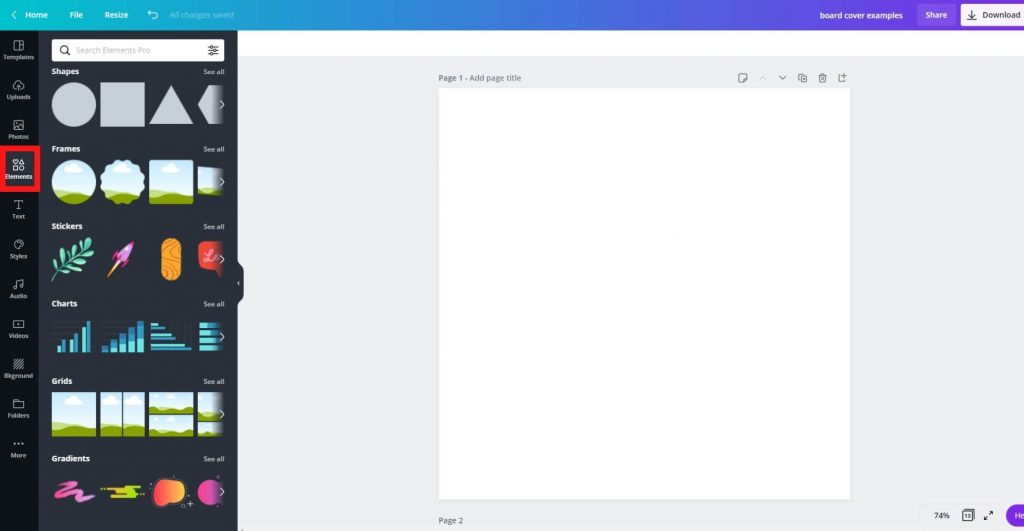
Step 3: Start designing your Pinterest board cover
Once you see a blank page, click on the “Elements” tab on the left-hand side where I boxed it using a red square.
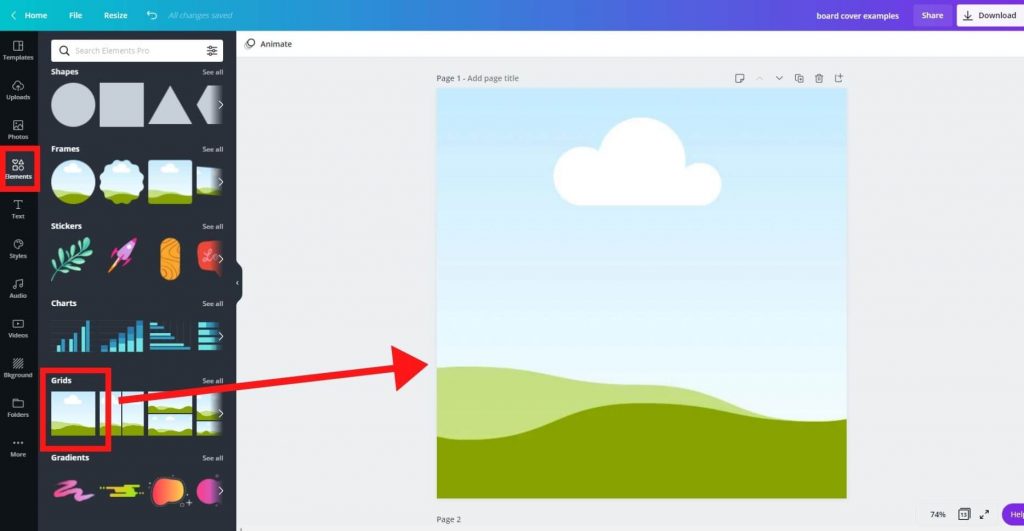
Step 4: Select the standard grid on Canva
Select the square grid under the “Grids” category. Later, you will realize that this allows you to drag pictures and images in and out of the grid.
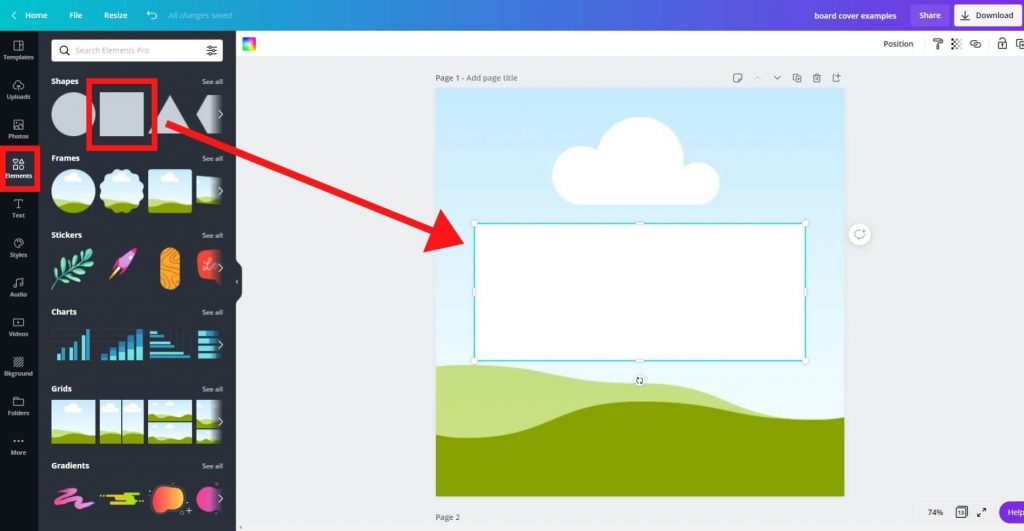
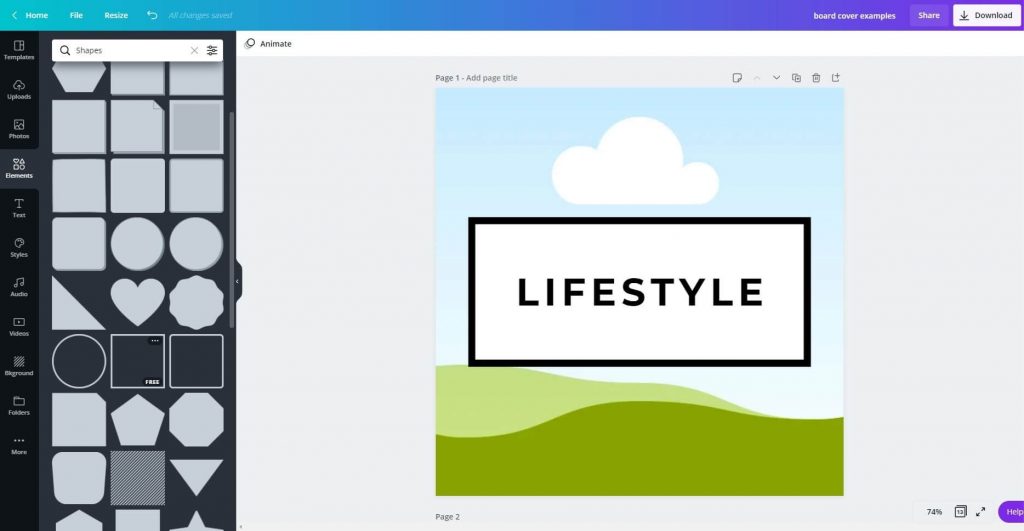
Step 5: Use shapes in Canva to design board covers for Pinterest
Under “Shapes,” select the square shape and adjust that into a rectangle. Play around with the size, and once you’re satisfied, position it in the middle.
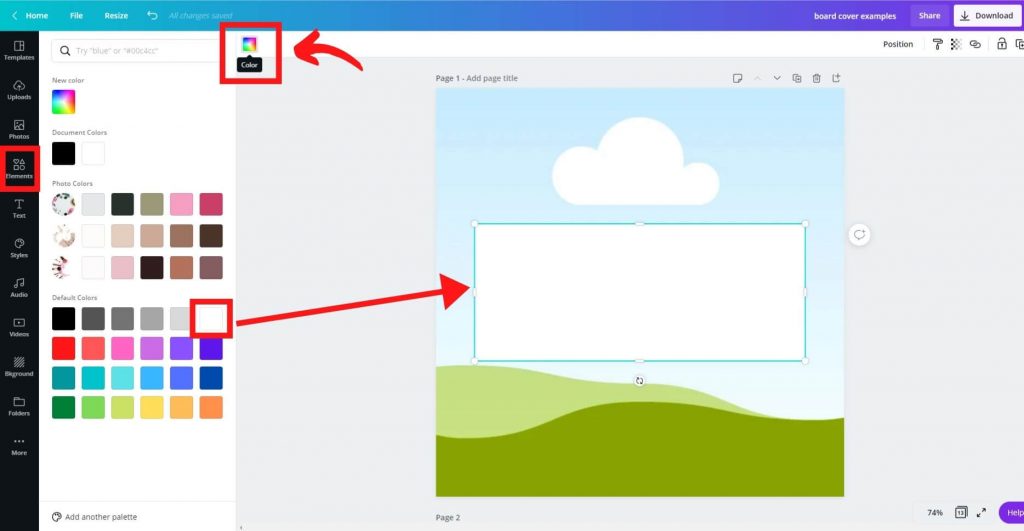
Step 6: Play with colors on Canva
You can click on the “Color” tab at the top left-hand (see the red box). This function allows you to change the color of your shape.
I chose white for simplicity in this case.
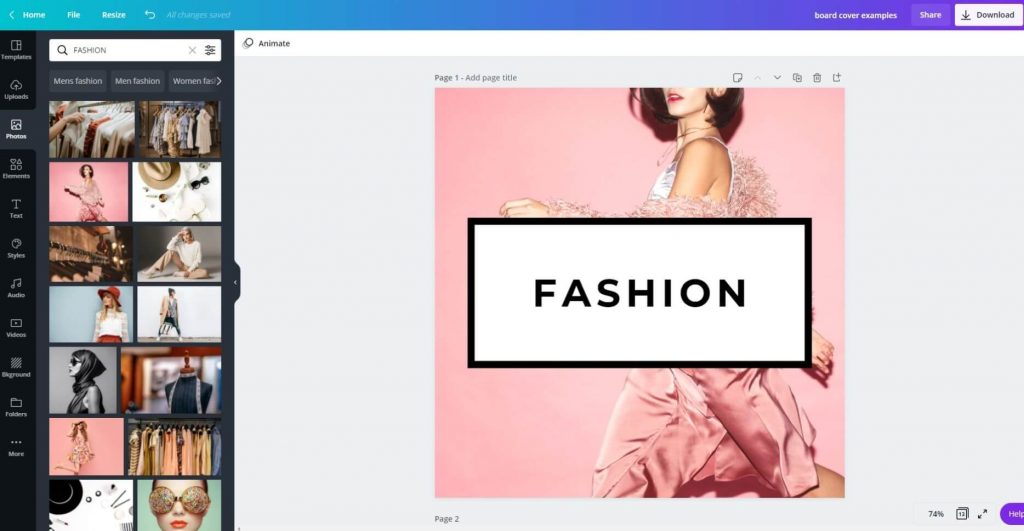
Step 7: Input keywords or phrases for your Pinterest board cover
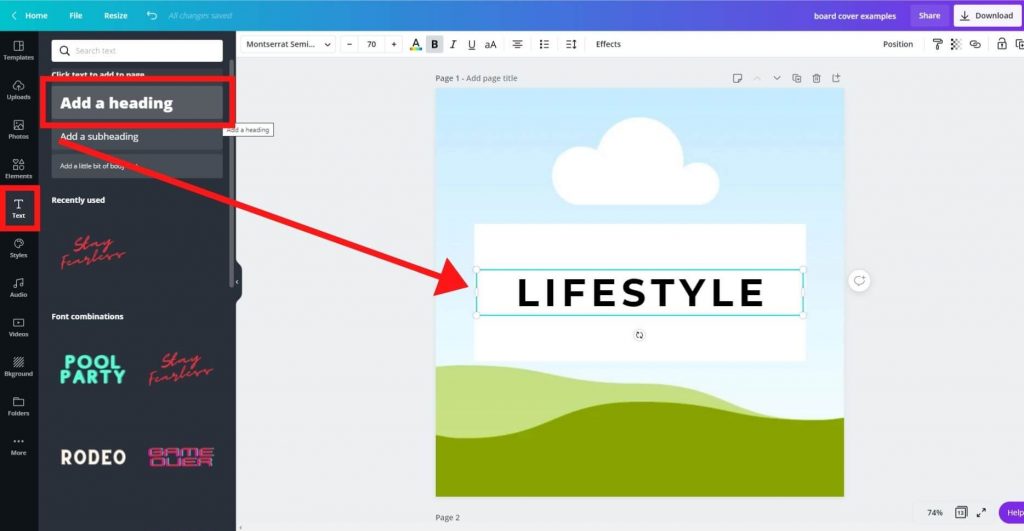
Next, click on “Text” on the left-hand menu.
Then click on the “Add a heading” selection. This function allows you to type words and phrases into the text box.
Depending on what you blog about, you can choose a variety of keywords and phrases that describe what you’ll be saving in that particular board on Pinterest.
In this example, I used a very general keyword, “Lifestyle.”
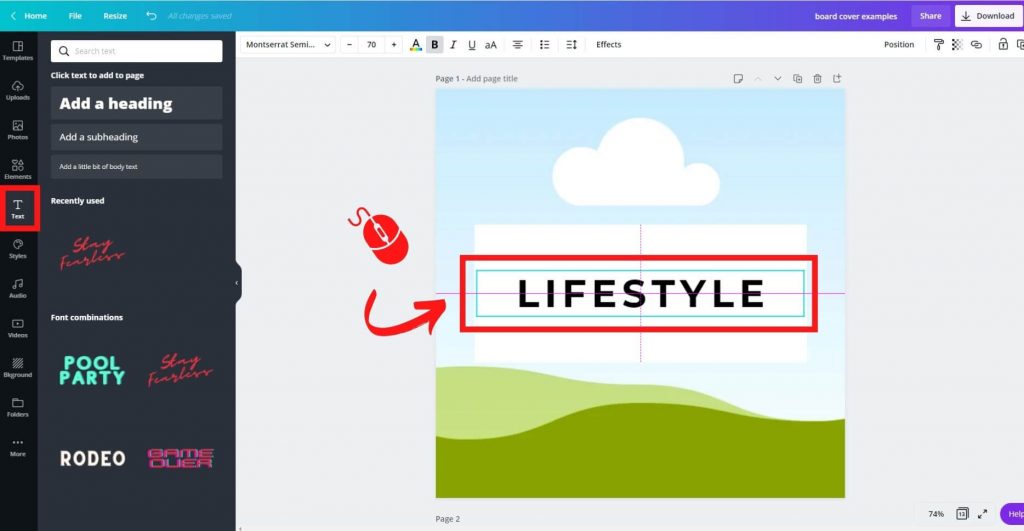
Step 8: Adjust your phrase or Pinterest board cover title
You can center your text by using your mouse. Click, hold, and position it by moving it around.
The dotted purple lines will indicate whether or not your text falls within the middle.
Step 9: Add a border in Canva
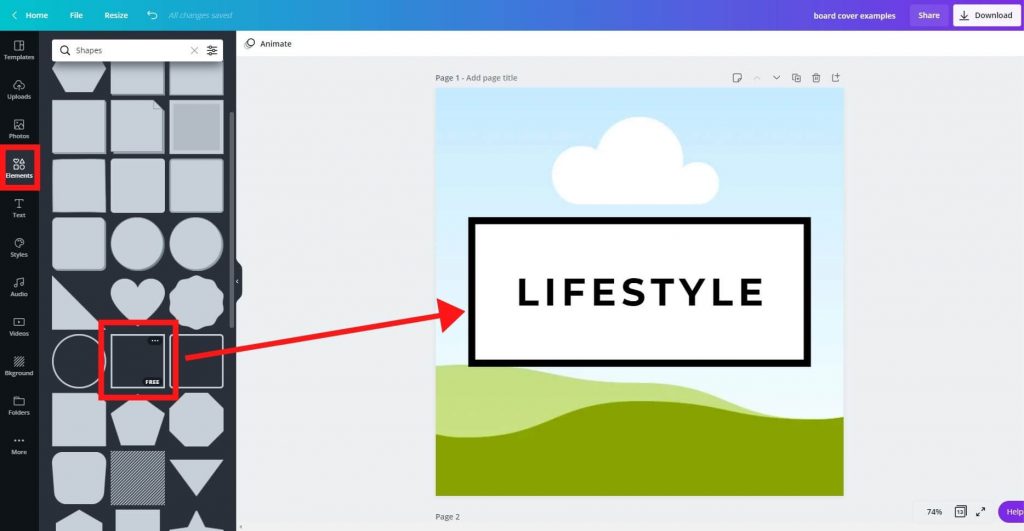
To add a pop, you can choose to add a border outline.
You can do this by going to the “Elements” tab and selecting the square-shaped outline as indicated in the screenshot below.
You can adjust the size and shape by using your mouse and dragging it.
Step 10: Add images
Now comes the fun part! We are going to add beautiful images to your Pinterest board covers now!
In the “Photos” tab, you can search for images by typing in phrases or keywords that describe what you are looking for.
For example, if you are looking for a pair of shoes you can type in words or phrases such as casual shoes, high heels, running shoes, etc.
FYI: Generally speaking, the more general your keywords and phrases are, the better your results when searching for images on Canva.
If you are using the free version of Canva, you will notice that you have very limited access to good photos.
This is another reason why I prefer using the Pro version of Canva. It gives you A LOT more function and tools to use in addition to unlimited access to higher quality photos compared to the free version.
You’ll save so much time and hassle with the Canva Pro! Plus, investing in the Pro is very affordable and worth every penny for your blog!
Here is an example of a high-quality photo I am using for the Lifestyle board.
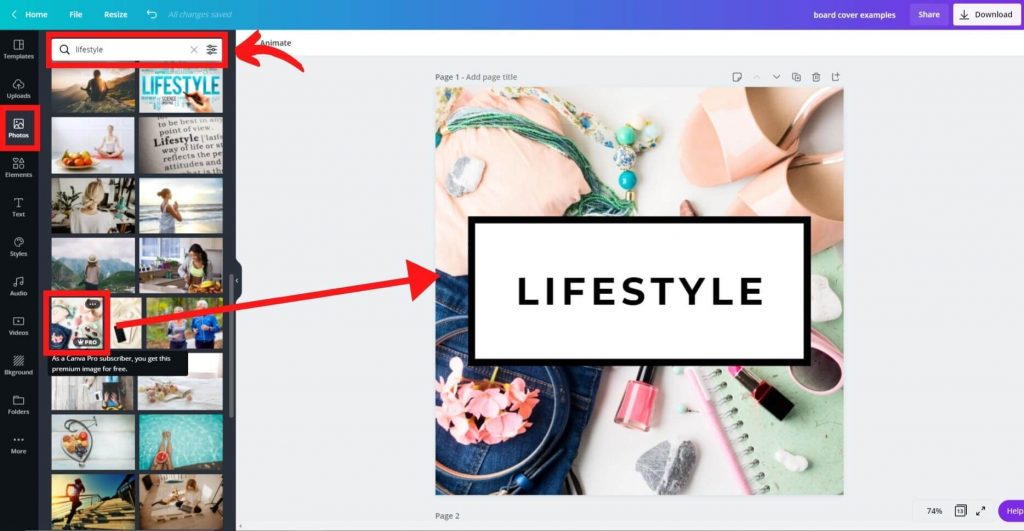
When you hover over an image in Canva, you will see which images are free and which ones are not at the bottom right-hand corner of each photo. When it says “FREE” it means you do not have to pay for the image.
On the other hand, “Pro” with a crown icon means you’ll have to pay for the image to use it if you are still on the free version of Canva.
The great thing about paying for a Canva Pro subscription is you’ll have unlimited access to all the beautiful images in the library for free.
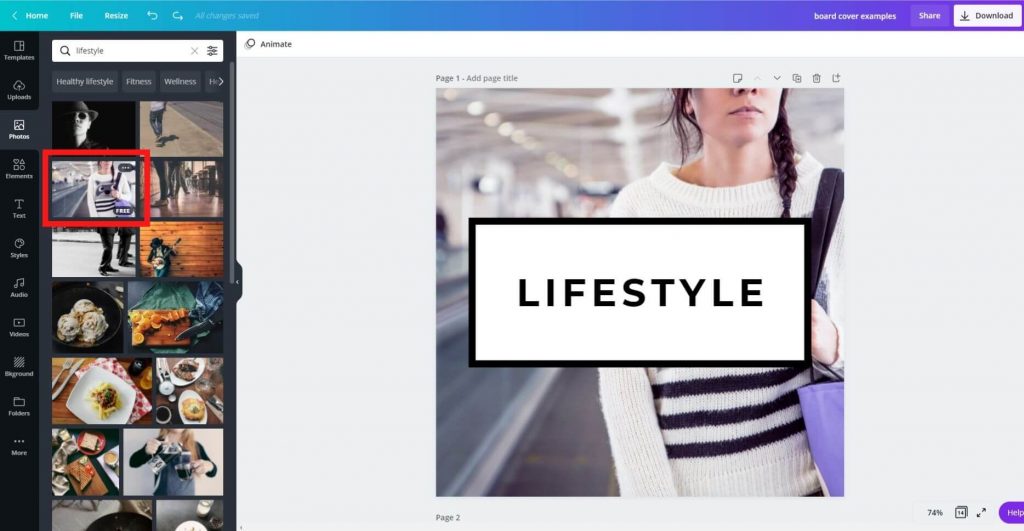
Step 11: Try switching photos to see which one you like best
Here is an example of a free image you can use if you are not using the Pro version of Canva.
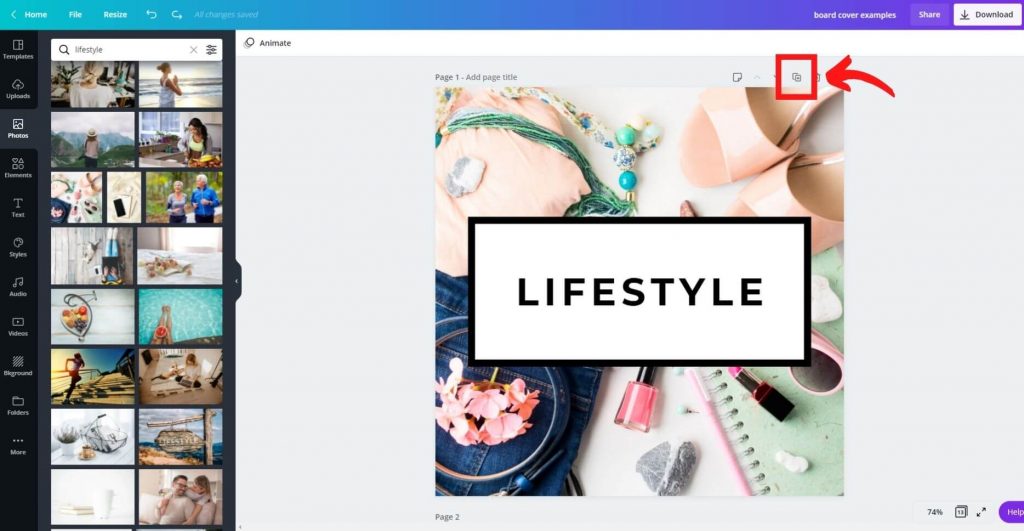
Step 12: Make duplicate copies of your Pinterest board covers
Congratulations! You are now done with creating your first Pinterest board cover! Yay!
Now, you can create multiple board covers without having to go through steps 1 to 10 again.
Just simply hit the “Duplicate page” function as shown in the screenshot below.
This will just make a copy of the same board cover.
Step 13: Create your next board cover image for another Pinterest board
It’s time to create your 2nd Pinterest board cover.
You can remove the image, and adjust the text to a different board category for the duplicated copy
Step 14: Play around with images and their sizes
Let’s use fashion as an example for your second Pinterest board cover.
I am going to use this image of a woman dressed in pink.
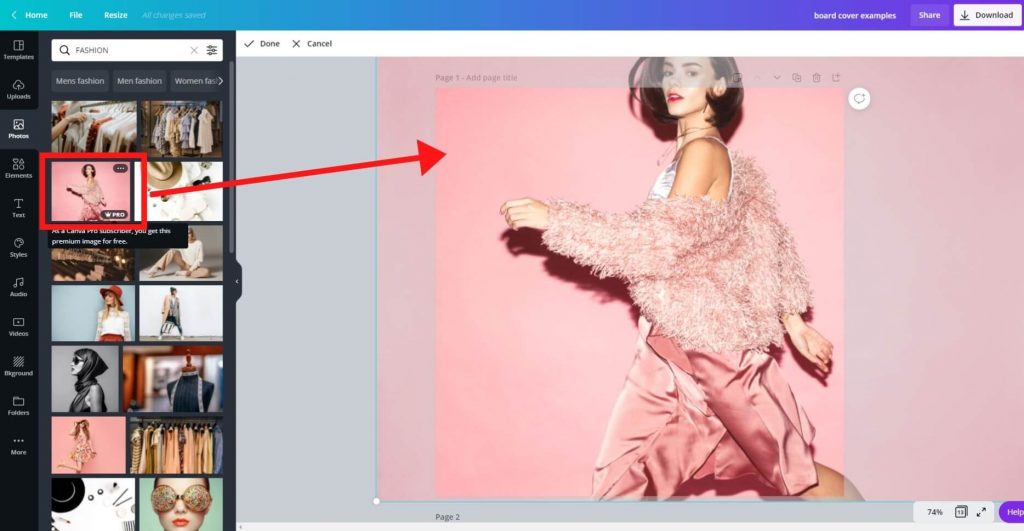
One thing you can do is blow up the image, adjust its size or cut certain areas out. You can do this by dragging the image into the grid, double-clicking on the image, and using your mouse to drag the corners and moving the cursor around.
Here is the final result of my second Pinterest board cover. Now, you can do this to all your other board covers, which will be super fast to create!
Step 15: Download and save your Pinterest board covers
Once you’ve finished creating your Pinterest board covers on Canva, don’t forget to download and save them to your computer folders.
Simply click on the “Download” button at the top right-hand corner of Canva and download them. You can choose PNG or JPG, but when it comes to uploading images onto Pinterest, I use PNG for higher quality.
In the download options, you can choose to download them all at once in a ZIP file or one-by-one individually.

How To Upload Your Pinterest Board Covers on Pinterest
Once you’re done creating your Pinterest board covers, and you’ve downloaded them onto your computer. you can upload them on Pinterest and set them as your board cover for each board.
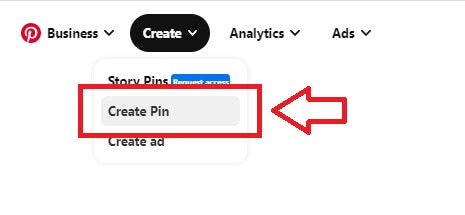
Step 1: Go into your Pinterest business account
Log into your Pinterest business account and click on “Create Pin” under the “Create tab on the top left-hand corner.
Step 2: Select the image you want to be your Pinterest board cover
Choose your board cover you want to upload from your computer directory.
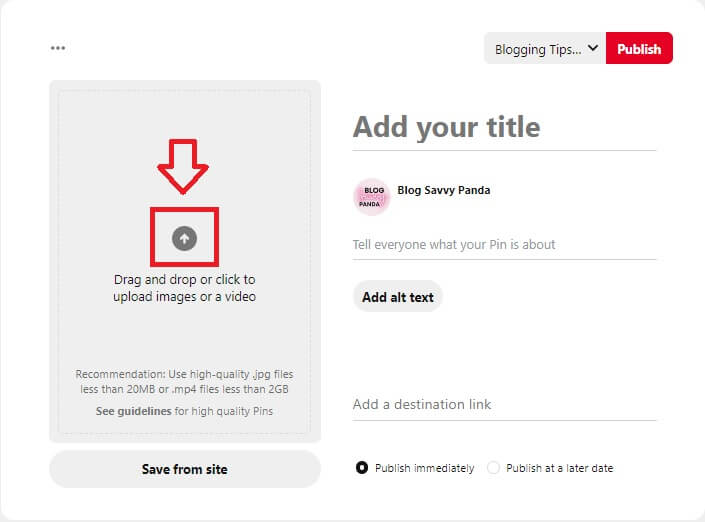
Step 3: Fill in the fields just like any regular Pinterest Pin
Fill in the fields and treat it like you’re uploading any regular Pinterest Pin.
Add your title – you can input anything that describes what the board is about.
Tell everyone what your Pin is about – again, you can just simply describe what the board is about and use general keywords appropriate for that board to help your audience find you.
Add a destination link – generally speaking, you can leave this blank since it’s a board cover, but I like to input a link to one of my blog posts or pages that is related to what my board is about. It’s better to have a link than to not because you’ll never know who’ll click and actually visit your page!
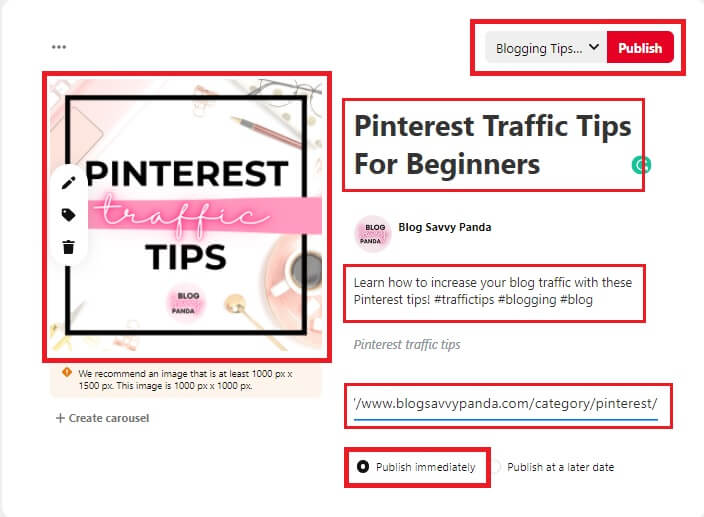
Make sure it’s set on “publish immediately” because you want to Pin it in real-time.
Last, on the top right-hand corner, click the drop-down menu and select the board you want this board cover to be.
In my case, I would select my “Pinterest Traffic Tips” board because I plan to use this cover for that board.
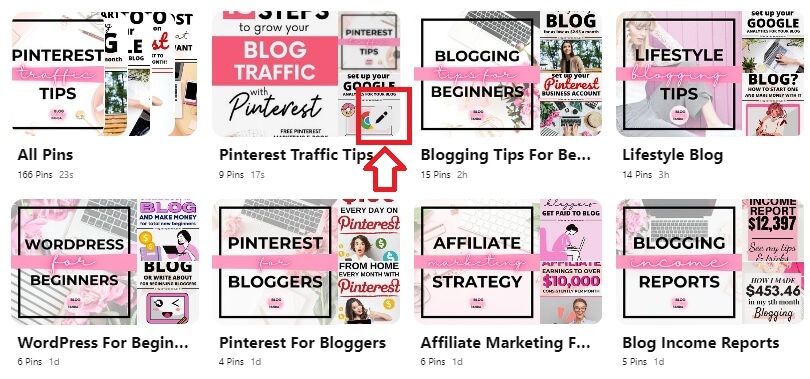
Step 4: Go back to your main Pinterest profile (under the “Saved” tab)
Go back to the main home page of your Pinterest profile where you can see all your Pinterest boards.
Hover over the board you just Pinned your Pinterest board cover to and click on the “pencil icon” so you can make edits.
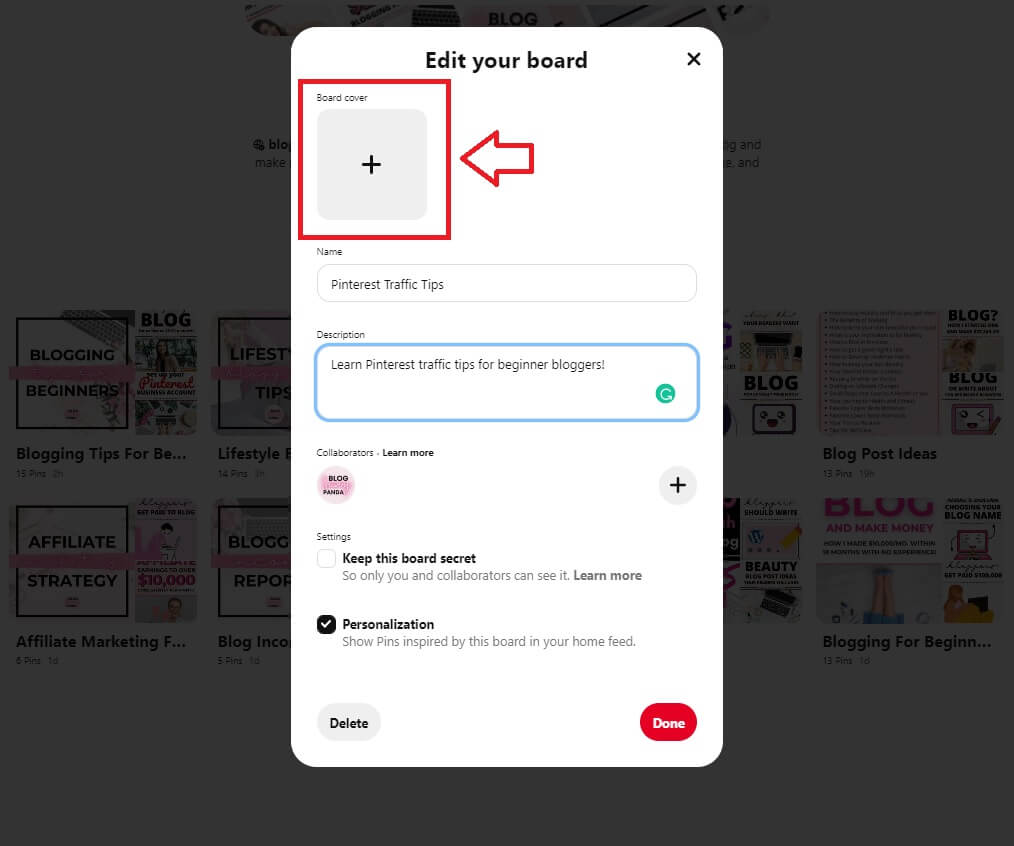
Step 5: Select your board cover image for that Pinterest board
This is where you can edit your board and choose your board cover image. Click on the “+” sign and you’ll be able to select the Pin or image you wish to make your Pinterest board cover.
Remember to click on the “Done” button.
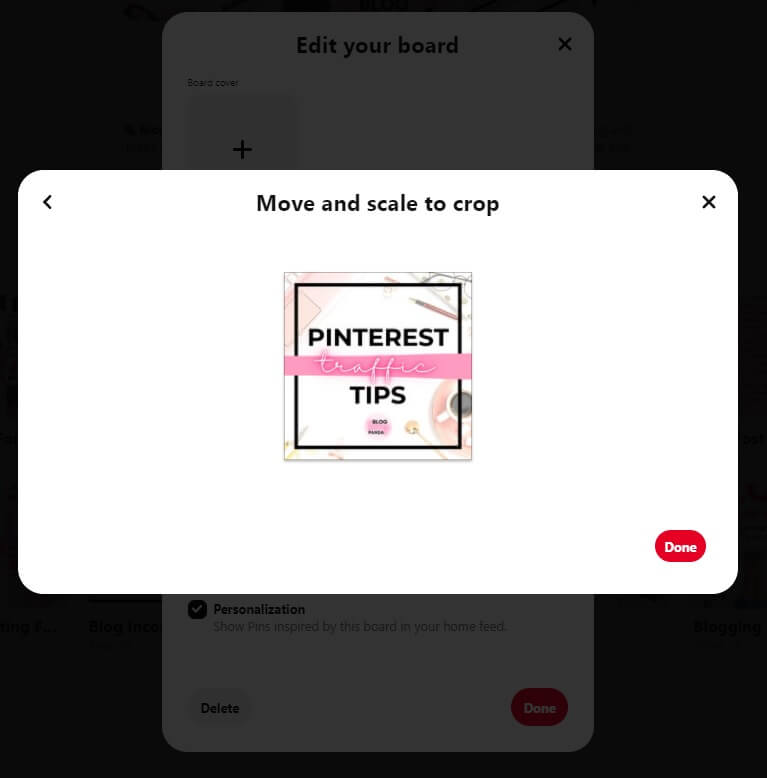
Step 6: Your Pinterest board cover is uploaded!
Click done and you are good to go!
Now, the image you just created on Canva is your Pinterest board cover!
There you go, my friend!
You see, wasn’t it easy to make your Pinterest board covers? 🙂
I hope you found this tutorial on how to make Pinterest board covers on Canva helpful and easy to follow!
Don’t forget to follow me, Blog Savvy Panda, on Pinterest here for my latest blogging and Pinterest tips for your blog!
Hello,
Thank You so much for this tutorial, Will try for this…
Let me know how it goes!
Thank you! I totally cleaned up my Pinterest, thanks to you! Would love it if you came to check it out!
Is it good to “kill two bugs with one shoe” and use the same covers for the same blog categories? or would the sizes be different?
You can do that. I wouldn’t emphasize on board covers. Instead focus on keywords, descriptions and creating content. 🙂
Thanks Ling! I never thought of this board cover. Might as well make board covers when I get a chance. 🙂
Yeah definitely give them a try! It’s quick and easy to make these Pinterest board covers with Canva! 🙂