

This post may contain affiliate links. Please read our disclosure policy for more information.
When you are learning how to set up a Pinterest business account, it is important and necessary to claim your website or blog on Pinterest.
As soon as you’ve created your Pinterest business account, this is the first thing you’ll want to do. By verifying your website, you’ll gain access to valuable business features on the platform as a business user.
But don’t worry, it’s going to be very simple that does not require any coding or technical steps! In this easy tutorial, we are going to show you how to claim your website on Pinterest step by step.
First of all, let’s quickly talk about why it’s important to verify your website or blog.
Why Claim My Website on Pinterest?
Here are the reasons why we recommend claiming or verifying your website or blog:
- This will optimize your Pinterest profile and help you bring traffic back to your site
- You’ll get access to your Pinterest Analytics where you can analyze and see your stats on your Pins’ performance allowing you to know your top-performing posts or pages
- It will show your profile picture on all the Pins that come from your site along with a “Follow” button next to it, which promotes your brand to users and Pinners
- A small globe icon will appear next to your website’s URL on your profile, which makes you look more authentic
As you can see, there is no reason to not claim or verify your website on Pinterest! Taking the extra step to do this will provide you with many benefits as a business user.
How To Claim Your Website On Pinterest
So, yes, it is important to claim your website because not only will this allow you to start promoting your content on Pinterest for free, but you’ll also get access to your website analytics, which is crucial to growing your blog or business.
Step 1: Go to the “Claim” page
If you’re not already on this page, you can go to the top-right corner of your Pinterest account and click on the drop-down arrow. Select “Settings” from there.

Step 2: Select Claim
Select “Claim” (it will have a globe icon next to it) from the left panel.
Now, input your website/blog URL into the “Claim your website” field.
Step 3: Claim Your Website Using Headers and Footers Option
There are a few ways to claim your website on Pinterest, but I’m going to cover one of the easiest methods that most people use, which is using the “Insert Headers and Footers” plugin.
If you don’t have the “Insert Headers and Footers” plugin, I recommend installing it. You can check out this quick and simple tutorial on how to install a plugin in WordPress for beginners. I promise this will take less than 3 minutes to do.
Once you’ve installed the plugin, you can proceed from here on.
When you click on the “Claim” button, Pinterest will ask you which method you want to use to claim your website.
You’ll also notice that Pinterest gives you a code (AKA HTML tag) that looks something like:
<meta name=”p:domain verify” content=”7x6x2f3XXXXXXXXXXXXXXXXXXXX”/>
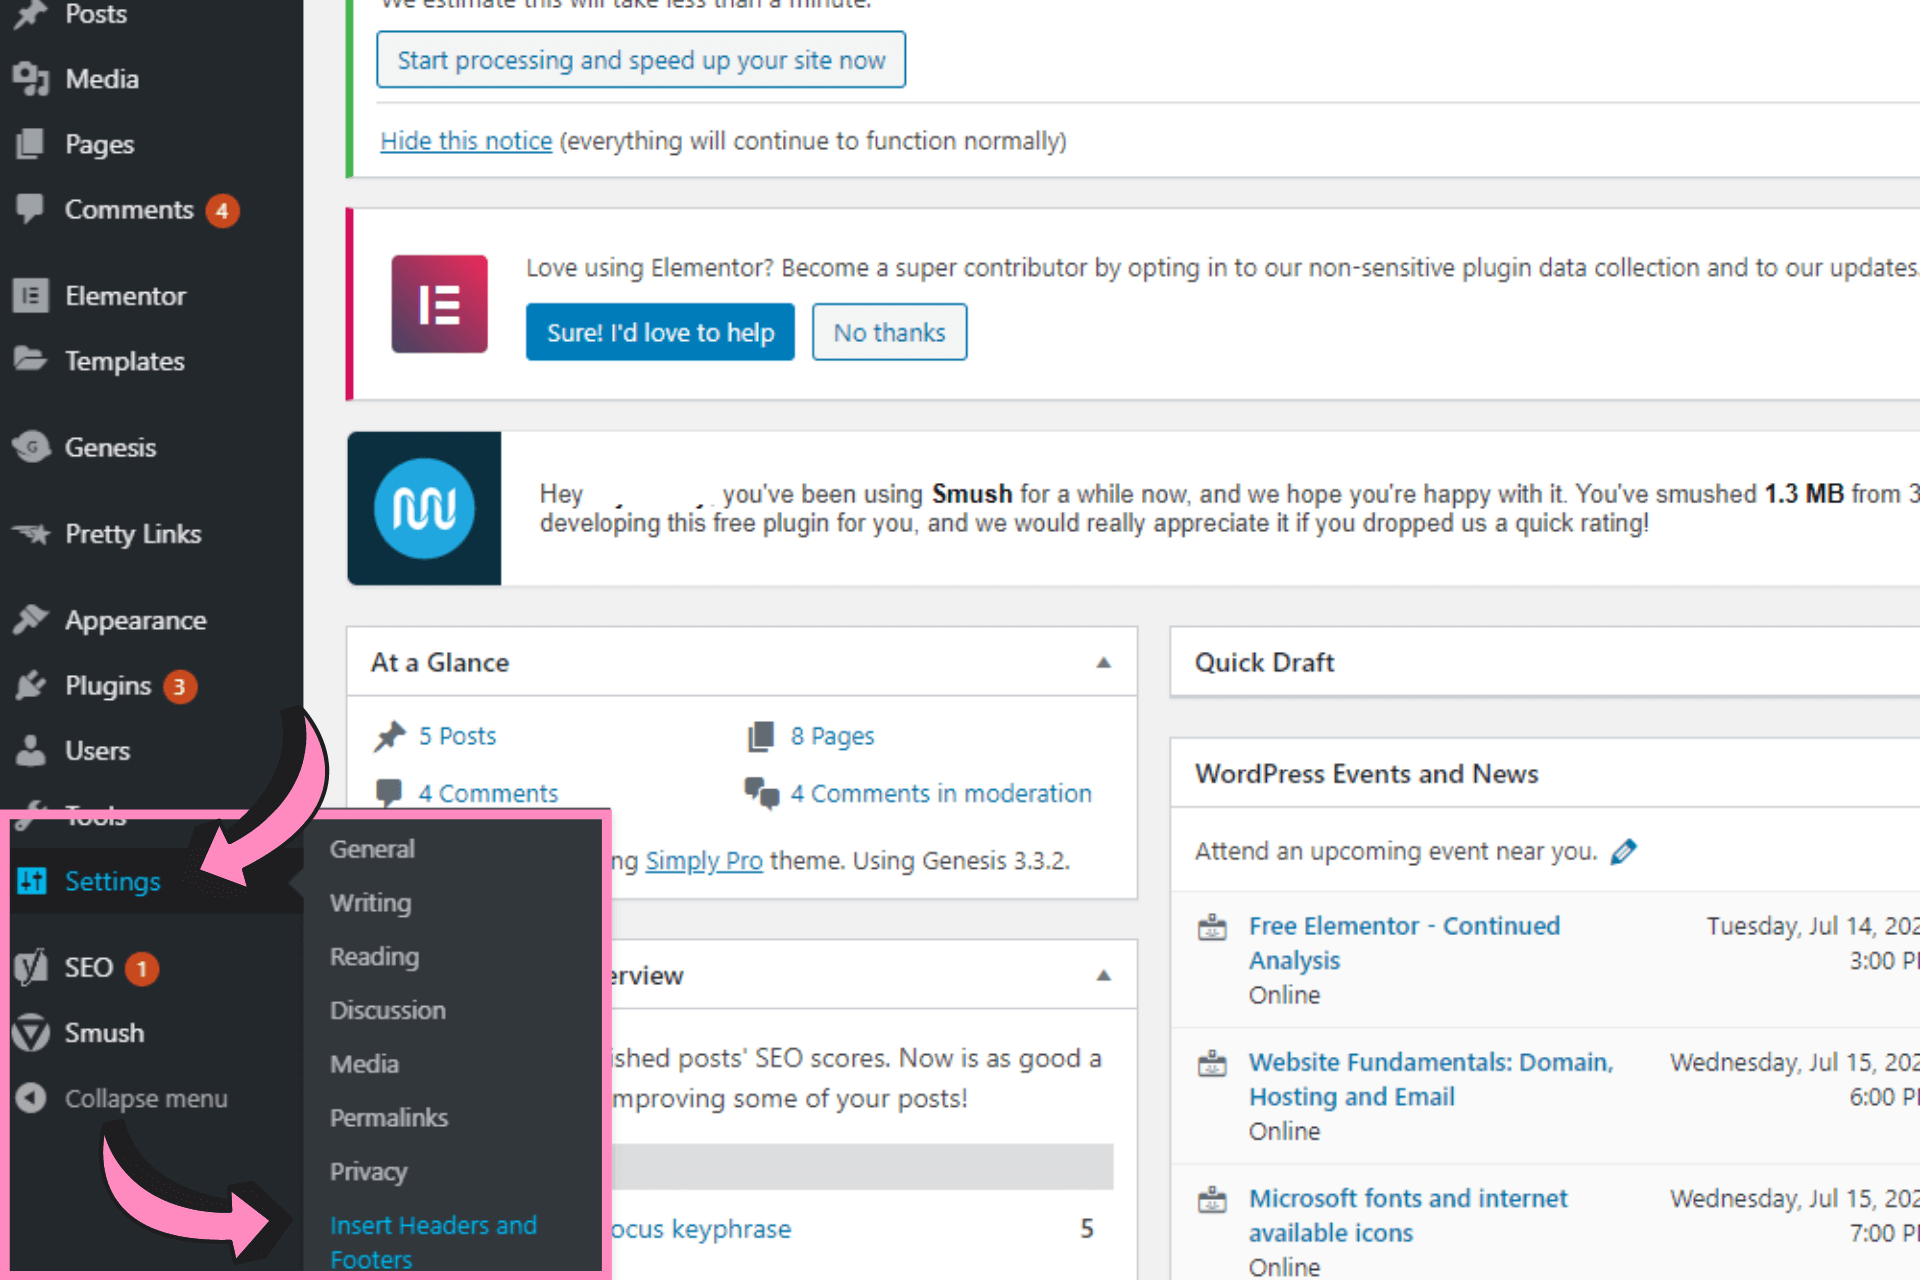
Step 4: Go into your WordPress dashboard in a separate window browser
Assuming you already have the “Headers and Footers” plugin installed onto WordPress, go to “Settings” >> “Insert Headers and Footers” from your WordPress dashboard.
Copy and paste the code (AKA HTML tag) that Pinterest gave you. It should look something like this:
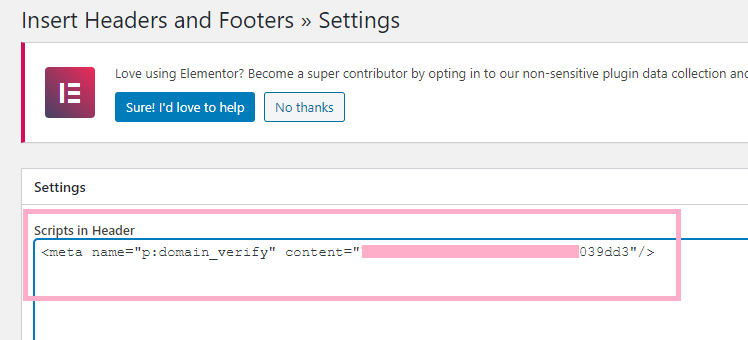
Remember to hit the “Save” button after you paste the code into the “Scripts in Header” box.
Step 5: Go back to the Pinterest window browser
Now you can go back to the Pinterest window and click on the “Next” button in the popup. You’ll be asked for a confirmation to send your website for review.
Step 6: Wait for an e-mail confirmation from Pinterest
Once you get an e-mail confirmation from Pinterest within 24 hours, go to the “Claim” section in your Pinterest account to verify that it’s been confirmed.
Make sure you see a green checkmark next to your domain name. It should look like this:
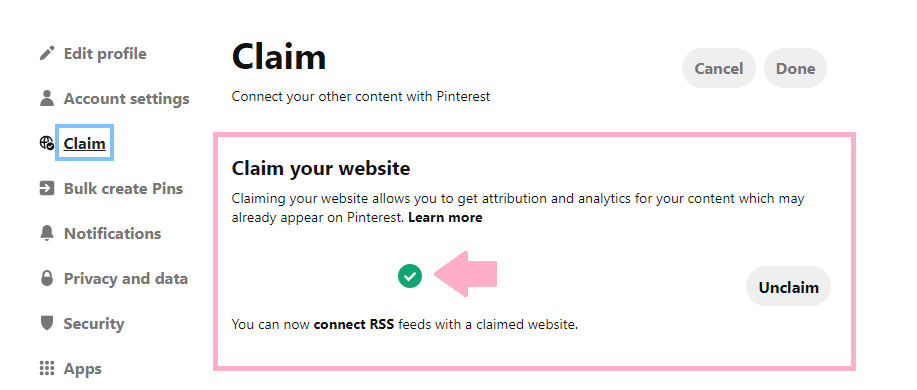
Once you receive an email confirmation from Pinterest and you see a globe icon with a checkmark next to your website URL on your Pinterest profile, then you are officially done! 😊
I hope you found this tutorial helpful in claiming your website on Pinterest using the Headers and Footers plugin option!
Hi, Ling…
I love reading your article…
Thank You
It’s really helpful to me.
Thank You!…